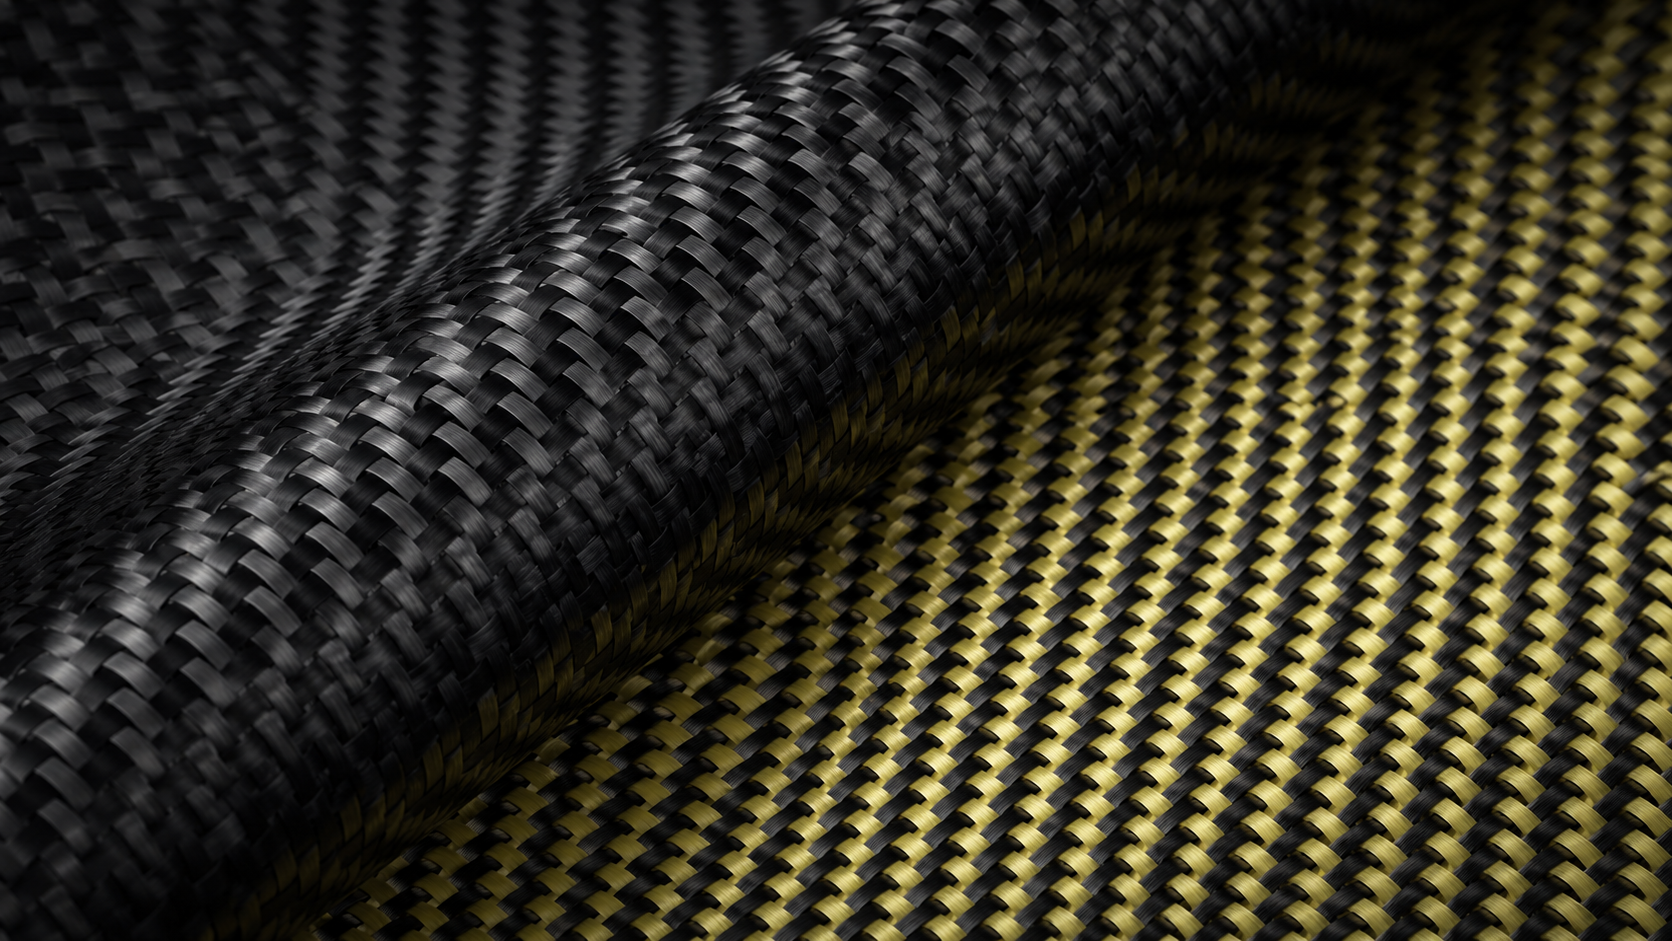
Real carbon fiber costs thousands. A quality roll of carbon fiber vinyl film costs tens of dollars — and most people can’t tell the difference. That gap is where this guide comes in.
Maybe you’re staring at a faded dashboard, not sure it’s worth the effort. Or you’ve already ordered your first roll of 3D carbon fiber vinyl wrap and don’t know where to begin. Either way, this guide covers every surface, every tricky corner, and every mistake worth skipping. Dashboard, steering wheel, door panels — the whole interior, laid out in a way that makes sense.
For a complete overview of all carbon fiber wrap types, benefits, and applications, start with our Ultimate Carbon Fiber Wrap Guide 2026.
Choosing the Right Carbon Fiber Vinyl Wrap for Car Interior

Not all carbon fiber vinyl is equal. Pick the wrong one and you’ll notice fast — glare hitting the wrong spot, or a bubble that won’t lie flat.
Two decisions matter most: texture depth and stretch rate.
3D vs. 5D: Match the Texture to the Surface
-
3D carbon fiber texture (0.5–1mm depth) works well on flatter surfaces — door panels, switch panels, console accents. The shallower weave stays clean and subtle. It doesn’t fight the light.
-
5D carbon fiber texture (1.5–2mm depth) is made for dashboards. The deeper grain catches ambient cabin lighting and gives a real, three-dimensional look.
Stretch Rate Decides Whether Corners Hold
Curved interior surfaces need a film that stretches at least 150% without tearing. VViViD XPO hits 180–200% stretch. That handles tight curves with fewer relief cuts. 3M DI-NOC sits at 130–150% — stiffer, more forgiving on flat panels, and better suited to professional installs.
How Much to Buy
|
Surface |
Estimated Coverage |
|---|---|
|
Dashboard |
~12 sq ft |
|
4 door panels (full set) |
20–25 sq ft |
|
Center console |
~6 sq ft |
|
B-pillars / trim pieces |
1–2 sq ft each |
Add 25% to your total for curves, overlaps, and miscuts. A full interior kit runs 50–100 sq ft on average.
Colored Finishes Come With Trade-Offs
Matte black is the safest pick — scratch-resistant, low-maintenance, and rated 5+ years indoors. Red and gold both look sharp on accents. But red fades 20–30% faster on sun-exposed dash areas. Gold drops about 15% in durability due to heat sensitivity. Go with either color and you’ll want to add a UV-protective topcoat. Also post-heat at 212°F after application to lock the edges down.
If you’re curious about the real differences between forged carbon fiber and traditional 3D/5D patterns, check out our detailed breakdown in Forged Carbon Fiber Wrap Explained.
Tools & Materials Checklist Before You Start
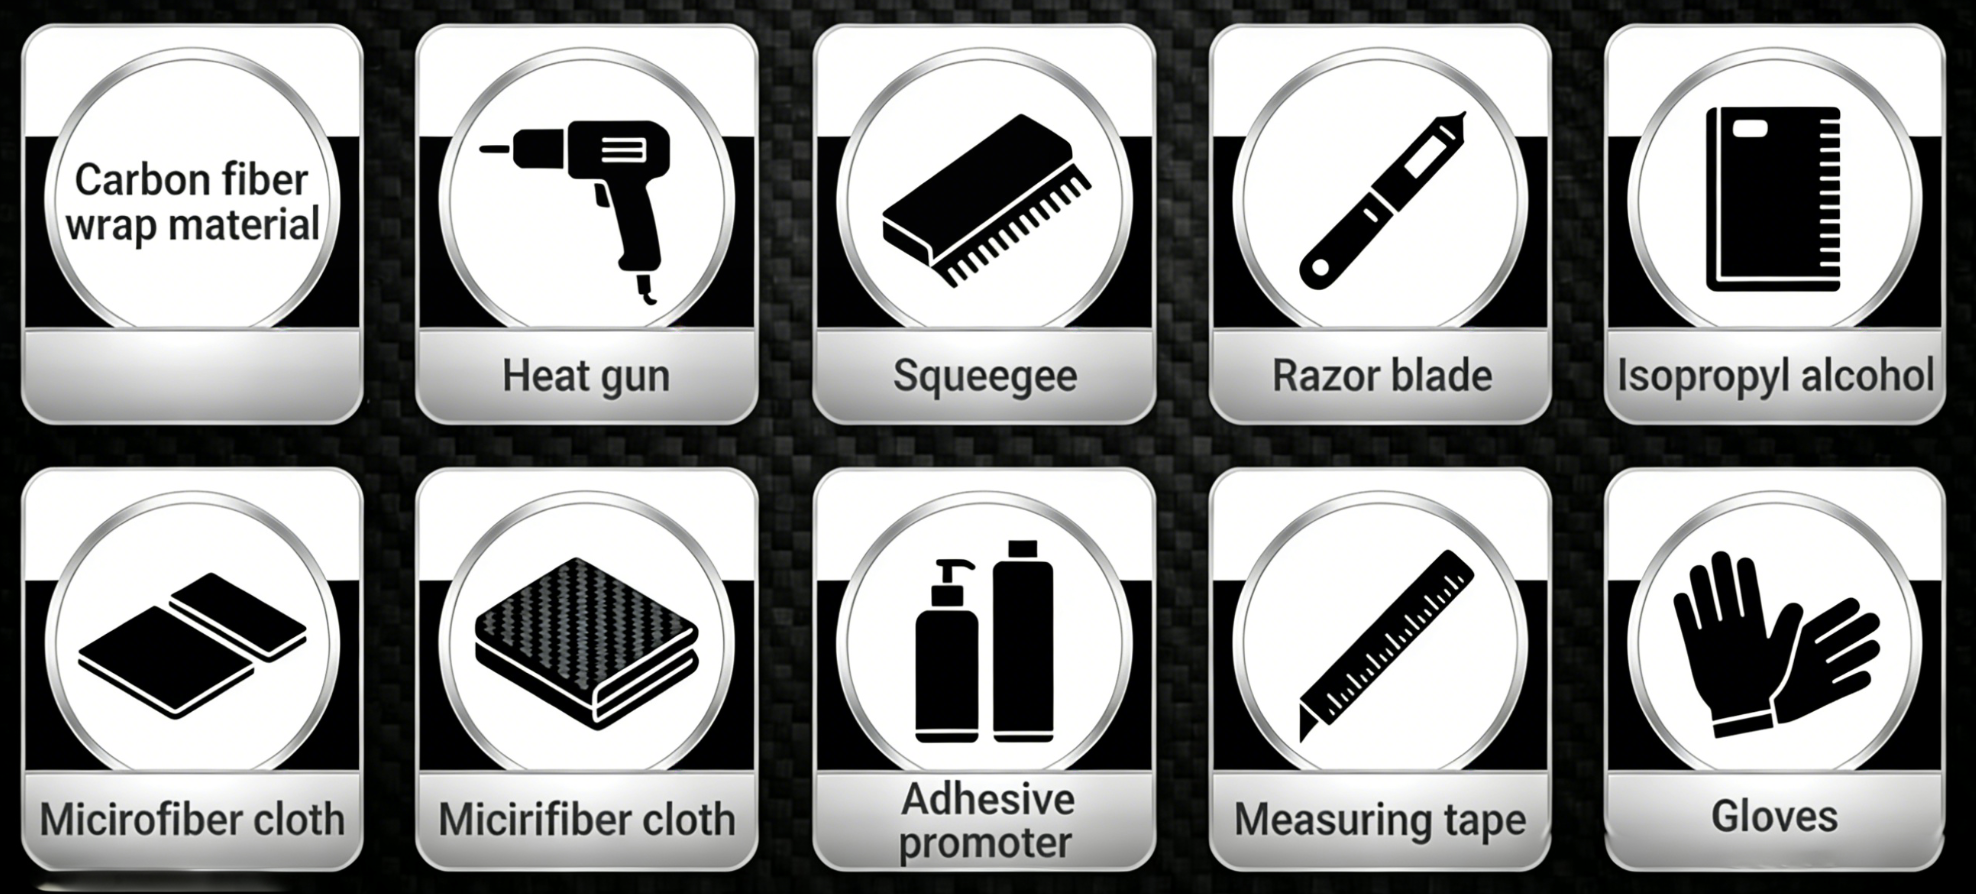
Wrong tool at the wrong moment turns a clean wrap job into a frustrating redo. Here’s what you need on the table before you peel anything.
Application Tools
– Heat gun — stretches vinyl around curves and locks down edges. Non-negotiable.
– Squeegee or felt-edged applicator — pushes out bubbles without scratching the film. The felt edge protects the surface while you press.
– Precision knife or X-Acto blade — gives you clean cuts along trim lines. Keep spare blades close. Dull blades drag and tear.
– Magnets — holds the vinyl in place while you line everything up before pressing down
Surface Prep
– Isopropyl alcohol (70–90%) — strips grease, dust, and factory residue off the surface. Skip this step and the adhesive won’t stick properly.
– Lint-free microfiber cloths — wipe surfaces dry and clean. No fibers left behind, no contamination under the film.
Measuring & Cutting
– Tape measure + soft fabric ruler — use the fabric ruler on curved panels. It bends with the shape. A rigid metal ruler won’t follow curves the same way.
– Cutting mat — protects your work surface during pre-cuts. Saves your table and keeps cuts straight.
The vinyl itself: pick a 3D or 5D carbon fiber vinyl film with at least 150% stretch rating. Do this before touching any curved interior panel. That stretch rating is what makes or breaks the job. Everything else on this list supports it.
How to Wrap a Car Dashboard with Carbon Fiber Vinyl

The dashboard is the hardest surface in your interior to wrap — and also the most visible. Get it right and the whole cabin transforms. Rush it and you’ll have bubbles staring at you every commute.
Start by pulling the trim piece out if you can. Wrapping on the car works, but removing the panel lets you wrap vinyl around the backside of every edge. That wrap-around stops corners from peeling as heat builds up in summer.
Before anything touches adhesive:
Clean the surface with isopropyl alcohol and a microfiber cloth. Push the squeegee edge under the cloth to get into crevices. Oil and dust sitting in those gaps will kill adhesion at the edges first.
Cutting and placing the vinyl:
Carbon fiber vinyl ships in 24″ rolls. Measure your dashboard with care. Account for curves and raised ridges — flat measurements lie. Leave at least 1 inch of excess on every side before cutting.
Peel the backing and place the film without stretching it. Tack down the flat center section by hand first. Then pick up the squeegee. Starting from the middle out stops wrinkles from getting trapped under the surface.
The technique that handles curves:
Use the triangle technique on contoured sections. Stretch across high points from side to side rather than pushing straight into them. Apply heat until the vinyl looks close to liquid. Wrinkles will show up along the top and bottom edges as you heat — that’s normal. Keep going. They smooth out.
Run a plastic card next to the heat gun. This guides the vinyl around contours and clears air bubbles as you go. Don’t let bubbles sit — they get harder to move once the adhesive grabs.
Edges and final lock-down:
Trim the vinyl leaving 0.25 inches past the trim edge. Soften that strip with light heat. Use your fingers to roll it around the backside. Press the hard edge of your squeegee into the fold to seat it flat and tight.
Finish by sealing everything down with a wrap glove and a final pass of heat. Lock down any raised ridges before moving to the next surface. High points left loose will pull everything around them up with them.
How to Wrap a Steering Wheel with Carbon Fiber Film

Your hands never leave the steering wheel. That’s what makes wrapping it different from any other interior surface. You can’t treat it like a door panel or a center console.
One rule before you start: don’t wrap the grip zone. The outer rim is off-limits. Your hands make 80–90% of their contact there. Carbon fiber vinyl breaks down in under six months under that kind of daily friction. There’s also a safety issue — bare or textured grip surfaces need a friction coefficient of 1.2–1.5. Film drops that below safe levels. Stick to the spokes, the central hub, and the trim rings. Those are your canvas.
Cut small. Work in segments.
Skip the large sheets. Cut film strips 2–4 cm wide for each spoke section. Divide each spoke into 4–6 individual pieces. Apply from the outer edge inward — halve the section as you go. This approach cuts error rate by about 50% compared to trying to wrap a spoke in one shot.
Seams are sometimes unavoidable. Line them up parallel to your main light source. A 12-to-6 o’clock vertical seam under cabin lighting hides 0.5–1mm overlaps with no visible gap.
Tape, heat, tuck — in that order.
Run 3M automotive double-sided tape (5–10mm width) along spoke edges in 2–3 cm sections. Taping the full wheel takes about 3–4 minutes. Leave the center hub tape-free until the spokes are done.
Heat gun sequence:
1. Position your film segment, set the heat gun to 80–100°C, and stretch the vinyl over the spoke
2. Tuck edges into the 2–3mm seams using a soft plastic tool — no metal, no scratching
3. Start with the bottom spoke, move to the top, halving each segment as you press
4. Final pass at 120°C for 30–60 seconds per area to lock the adhesive in place
Don’t rush the cure.
Let the wheel sit 12–24 hours before checking your seams. Any lift over 0.5mm means that section needs a reheat. Skipping the overnight cure causes 70% of edge curl failures. It’s the easiest step to skip and the most expensive mistake to fix.
Tucking done? Run one full-wheel heat cycle at 100°C for 2 minutes, then air dry for another 24 hours. Test your tucks under light tension — about 5kg of simulated grip force — to confirm everything holds before reinstalling.
Reinstallation torque specs: central bolt at 29 ft-lbs; airbag T30 Torx fasteners hand-tight plus a quarter turn.
Eight to twelve segments per wheel is the standard. Take your time, apply heat with purpose, and the finish holds where it should — and stays off where it shouldn’t.
How to Wrap Door Panels with Carbon Fiber Vinyl

Door panels are more forgiving than dashboards. The surfaces are larger and flatter — that sounds easier, and it is — but size brings its own headaches. More surface area means more chances for uneven tension to sneak in before you spot it.
Cut generous. Always.
Size your carbon fiber vinyl film at least 5–6 inches larger than the panel on every side. For smaller trim pieces around the door — speaker surrounds, pull handle inserts — 1 inch of excess per edge is enough. Don’t cut tight. You can always trim back. You can’t add film you already threw away.
Work the panel in zones, not all at once.
Divide large door panels into sections. Heat one zone, squeegee it flat, then move to the next. This keeps uneven tension from building across the full panel before you catch it. Start by peeling just the top few inches of backing. Press the center strip down as your anchor point. Then squeegee outward at a 45° angle using overlapping strokes.
Curves and recesses need direct heat.
Set your heat gun to at least 212°F. On concave areas, heat the surface until the carbon fiber vinyl wrap looks close to liquid-smooth. Then press the deepest point first with your palm. Work from back to front. Wrinkles that show up during this step are normal — they flatten out as heat spreads across the area.
Corners: small pulls, short bursts.
Don’t try to stretch a corner in one move. Use small, sequential pulls with a short heat burst between each one. An extra set of hands helps a lot here. Big stretches create micro-tears in the 3D carbon fiber texture that catch the light later.
Blade angle matters more than you think.
Standard vinyl cuts clean at 30°. The raised weave of 3D carbon fiber vinyl needs 45–60° — anything less and the blade catches on the texture. One smooth pass per cut. No sawing.
Finish with a full post-heat at 212°F across the entire panel. Run extra passes over corners and edges. Any bubble that stays after heat gets a pin poke, then firm pressure right away. Don’t leave it to “settle.” It won’t.
Pro-Level Application Techniques: Heat Gun, Seams & Corners

The heat gun is where amateur wraps break down — not because people use it wrong, but because they treat temperature as a fixed setting instead of a tool you control.
Heat gun temperature is not a set-and-forget setting. Start low: 120–150°F for initial seam activation and softening film around corners. That range warms the adhesive without distorting the 3D carbon fiber texture. Never hold it still — keep a steady sweep at 2–4 inches per second, at a 45° angle, 5–7 inches from the surface. Pause more than two seconds in one spot, and you risk a hotspot. Above 200°F, the vinyl burns. There’s no fixing that.
Adjust by season. Cold garage in winter? Add 10–20°F. Summer heat above 80°F? Drop 10°F and test on scrap film first.
Seams: choose your method by surface type.
-
Overlap seams (0.25–0.5 inch) work best on high-stress corners. The adhesive overlap takes on the tension where the vinyl gets pulled hardest.
-
Butt seams belong on flat panels. Run them perpendicular to your main light source — a seam against the light direction disappears. One running with it catches every glance.
For near-invisible butt seams, use the double-cut method. Lay both layers down, heat to 120°F, then cut through both layers at 0.1mm tolerance. Press with a roller at 10–15 psi, reheat the edges to 140°F, and the seam drops below 0.05mm visibility.
Corners and deep weave grooves need a concentrator nozzle. The wide reflector spreads heat across 4–6 inches — good for broad panels, too sloppy for tight spots. Switch to the narrow concentrator. It holds ±5°F precision over a tight 1–2 inch focus area. Spot-heat at 130°F, press with a finger or roller for 5–10 seconds, then sweep 3–5 passes from 4–6 inches out. This pushes the carbon fiber vinyl film into grooves 0.5–2mm deep with no stretch marks.
One upgrade worth adding for complex dashboards: pair your heat gun with a laser temperature sensor for ±2°F consistency. Sounds like overkill — until you see it cut corner rework by 30%.
DIY vs. Professional Installation

The honest answer isn’t “DIY is always cheaper.” It depends on the surface.
Flat panels — center consoles, door trim accents, switch surrounds — are easy for beginners. You’ll save the full labor cost, $50–$150 per hour, and your risk of a bad mistake stays low. Start here if you’re new to carbon fiber wrap application technique.
Compound curves change the math. Dashboard wraps bring wiring proximity, deep contours, and compound angles into play. A botched pull on the wrong section can mean $2,000+ in fixes. That’s where professional installation is worth the price.
A practical skill progression to build up your experience:
1. Center console pieces — flat, low-stakes, ideal first project
2. Door panel flats — single-plane surfaces, standard tools
3. Full dashboard — curves, heat control, patience required
4. Steering wheel trim — precision work, airbag hardware nearby
One reality most people underestimate: DIY material costs run 20–30% higher than people budget for. Miscuts, reruns, and learning-curve waste add up fast. Factor that in before you stack your total against a pro quote.
Go DIY on anything flat or slightly curved. Call a pro once compound curves, tight tolerances, or safety systems are part of the job.
Common Carbon Fiber Wrap Problems & How to Fix Them

Bubbles, lifting edges, torn corners — these aren’t signs you bought the wrong film. They’re signs something went wrong at a specific step. Every one of them has a fix.
Bubbles
Bubbles during application mean trapped air. This comes from uneven pressure or moving too fast across the surface. Slow down. Use overlapping squeegee strokes and work from center out.
Bubbles that show up days after installation? The adhesive layer has shifted. Hit the bubble with a heat gun to soften the bond. Then press firm with your squeegee.
One thing to know: matte and dry-finish carbon fiber texture vinyl holds bubbles tighter than gloss versions. With a dry-finish film, your margin for error is smaller. Take extra care with each stroke.
Edge Lifting
Edges lift for one of three reasons:
– The surface wasn’t clean before application
– No heat after tucking the edge
– The edge was never folded under at all
For minor lifting, inject a small amount of adhesive under the edge and press it flat. Go with an epoxy-based adhesive — it holds up to heat and pressure without pulling apart again. Then post-heat at 212°F to reset the bond.
Corner Tearing
Corners tear from stretching too far in a single pull. The right approach is smaller sequential pulls with short heat bursts between each one. Don’t rush this part.
For an existing tear on 3D carbon fiber vinyl wrap, cut a small patch at a 45° angle to the tear direction. Overlap it with compatible adhesive and let it cure. Once it’s set, sand the seam smooth.
Fading and Color Shift
Inferior carbon fiber vinyl film fades because the UV stabilizer content is too low. Check that the film specifies UV stabilizer content above 2–5% and has passed at least 1,000 hours of QUV testing. Those two numbers tell you a lot about long-term performance.
Red and gold finishes are the most vulnerable to fading. Add a UV-protective topcoat and plan to reapply it once a year on sun-exposed surfaces like the dashboard. Skipping this step on those colors speeds up color shift noticeably.
How Long Does Carbon Fiber Interior Wrap Last & Maintenance Tips

Film quality is the biggest factor in lifespan. Premium cast vinyl — brands like 3M, Avery Dennison, and KPMF — holds up 10–12 years in mild climates. Standard calendered vinyl tops out at 3–5 years before color fading and edge wear take over.
Real-world numbers tell a clear story. Garage-kept cars with daily use get 5–7 years out of a good wrap. Fleet vehicles under constant UV exposure and regular washing cycles land at 3–5 years. Cheap film with a bad install job? You’re looking at peeling inside 12–18 months.
Keep it clean, keep it simple:
– Hand wash with pH-neutral soap — wipe in straight lines, never circles
– Drop alcohol-based cleaners from your routine. They break down the adhesive backing fast
– Use vinyl-safe wax every three months to block humidity and pollution buildup
– No automatic car washes — the brushes tear up textured 3D carbon fiber vinyl wrap edges quick
Hot climates cut lifespan by 30–40%. Park in shade as much as you can.
Time to replace? Look for peeling edges, surface fogging, flattened texture, or more than 20% of the surface showing visible wear. That last point is worth paying attention to. Damaged film left in place too long can rip paint off the surface underneath once it finally lets go.
Carbon Fiber Interior Wrap Before & After: Real Transformation Results

The proof is in the panel. A 2014 Passat owner swapped out factory wood-grain trim with a single 1’x10′ roll of carbon fiber vinyl film. About 30% of the roll was still left when the job was done. The finish? A first-timer called it “pretty dang accurate” to real carbon fiber — not high-gloss, not matte. Just right. That’s the kind of result good film delivers.
Budget film tells a different story. A $25 TEMU roll caused visible tunneling on door panels. You can get away with that on low-visibility spots like carpet trim. On door panels? Not a chance. The white adhesive backing poked out at edges where the trim shape blocked a full wrap-around. Small surfaces hid the flaws. Large panels exposed every one of them.
The gap between those two outcomes isn’t luck. It comes down to film quality and technique.
FAQ: Carbon Fiber Interior Wrap
These questions come up all the time — and most answers are simpler than you’d think.
Can I wrap over existing trim without removing it?
Yes. Carbon fiber vinyl goes right over factory trim in most cases. Clean the surface with isopropyl alcohol first, then press the film down with firm pressure. That said, for B-pillars or anything with tight edges, pull the piece out first. You can tuck the vinyl a full inch behind the edge. That tuck is what separates a clean job from one that peels in six months.
Will it damage my interior?
Not if you do it right. Quality carbon fiber wrap adhesive backing — 3M’s formula, for example — bonds tight and releases without residue at 212°F. Stay 10–20mm from hard edges, post-heat every section, and you won’t have a problem.
Is it removable?
Yes. Heat the edges to loosen the adhesive, then peel slow and steady. 3M DI-NOC and most comparable carbon fiber vinyl film options lift off clean. The OEM surface underneath stays untouched.
Carbon fiber wrap vs. real carbon fiber — is there a difference?
|
Carbon Fiber Vinyl Wrap |
Real Carbon Fiber |
|
|---|---|---|
|
Cost |
$20–50 per roll; full interior DIY ~$50–100 |
$500–5,000+ per set; pro install adds $1,000+ |
|
Weight added |
~0.5–2 lbs total |
Reduces interior weight by 5–10 lbs |
|
Reversible? |
Yes — no residue, no damage |
Permanent; OEM parts must be cut out |
|
Appearance |
95% realistic under normal viewing |
100% authentic; superior depth, but yellows over time |
For interior trim, the vinyl wins on every practical level. The weight difference is real — but unless you’re building a track car, saving 8 lbs on door panels isn’t the goal. You want a finish that looks the part at a fraction of the cost. Vinyl delivers that.
Is carbon fiber vinyl safe on a steering wheel?
3M DI-NOC meets FMVSS 302 flammability standards. It self-extinguishes in under two seconds. Film thickness adds just 0.1–0.2mm. That clears ISO 6547 grip tests and has no effect on airbag deployment. Apply it smooth, squeegee the edges, post-heat to 212°F, and you’re within spec. One thing to keep clear: the grip zone. That part of the wheel isn’t about surface finish — it’s a safety line.
Conclusion
You’ve done the research. You know the tools, the techniques, and the traps to avoid. One roll of quality carbon fiber vinyl film and a free afternoon — that’s all that stands between your current interior and a cabin straight out of a motorsport showroom.
Here’s the honest truth: most failed wraps aren’t a skill problem — they’re a material problem. Cheap film bubbles, yellows, and peels before the season ends. No tutorial can fix that.
Start with your door panels if you’re new to this. Build confidence there. Get a feel for how the carbon fiber wrap adhesive backing responds to heat. Then move to the dashboard. Small wins add up fast.
Contact HyperX Carbon – Your Trusted Chinese Carbon Fiber Partner
Ready to source high-performance carbon fiber materials or custom forged carbon fiber parts from China?
HyperX Carbon is a leading manufacturer with 20+ years of expertise, specializing in aerospace-grade forged carbon fiber, prepreg, tubes, sheets, and lightweight automotive/drone/medical components. We offer:
-
Stable supply chain with premium raw materials (Toray, Mitsubishi, Hengshen)
-
AS9100D certified production for aerospace & UAV applications
-
Rapid prototyping (5-8 weeks) and monthly capacity exceeding 180,000 parts
-
Competitive pricing with 15-18% cost savings on forged carbon solutions
-
Full customization: from T700/T1100G to ultra-high modulus grades
Whether you’re an eVTOL developer, automotive OEM, drone manufacturer, or medical device engineer, HyperX delivers consistent quality, batch-to-batch reliability, and reliable delivery.
Get in touch today for a free consultation, custom quote, or material sample.
📧 Email: [email protected]
🌐 Website: https://www.hyperxcarbon.com/
📞 Phone/WhatsApp: +86 15623270276 (English support available)
Let’s build your next lightweight innovation together – contact HyperX Carbon now and stay ahead in the low-altitude and advanced composites market.