Carbon fiber steering wheels sell for $800, $1,500, sometimes over $3,000. Most of them aren’t built any better than what you’re about to make yourself.
This guide covers every stage of the build. You’ll go from pulling a mold to drilling your 6-bolt pattern to buffing out that deep, glassy finish. It works for a full carbon fiber layup build or a woven carbon wrap over your existing wheel.
Chasing lap times? Cutting weight? Or just want a cockpit that feels custom? Building your own carbon fiber steering wheel is more doable than those price tags let on.
Full Build vs Wrap: Which Carbon Fiber Steering Wheel Method Is Right for You?
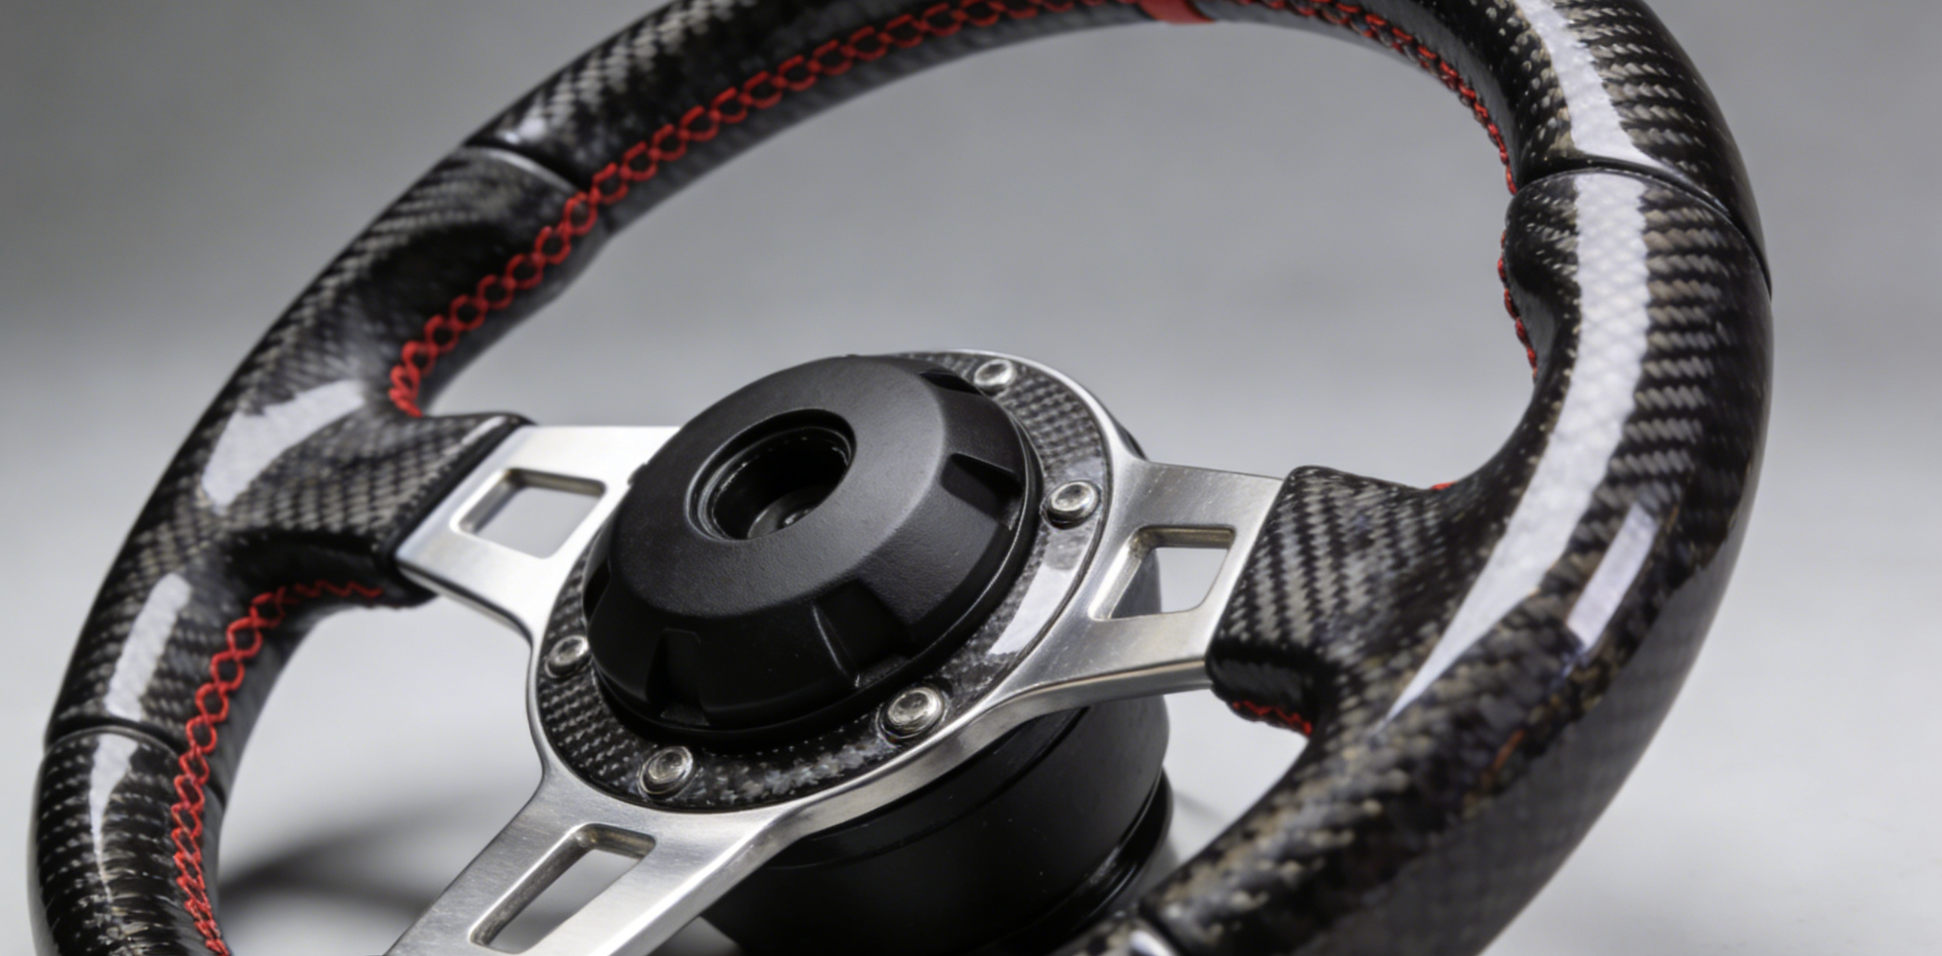
Your choice shapes everything — cost, timeline, and how the finished wheel feels in your hands.
Full build means fabricating a complete carbon fiber wheel from scratch. Plan for 10–40+ hours and $500–$2,000 in materials. The result is 50–70% lighter than your OEM wheel. Mechanical feedback is precise. It lasts decades.
Wrap means layering carbon fiber vinyl or hydro-dip film over your existing wheel. It takes a few hours and costs $50–$300. Weight savings are modest — about 0.2–0.5 lbs — but the visual upgrade is instant.
Here’s the honest split:
|
Full Build |
Wrap |
|
|---|---|---|
|
Skill needed |
High |
Moderate |
|
Cost |
$500–$2,000+ |
$50–$300 |
|
Build time |
10–40+ hours |
1–4 hours |
|
Weight savings |
50–70% |
10–30% |
|
Longevity |
Decades |
Fades within months |
Track builds lean full carbon. Even one pound of weight reduction is noticeable through aggressive turns. Street and everyday drivers lean wrap. It’s fast, reversible, and easy on the budget.
Street legality is a real concern here. Full carbon builds seldom meet DOT/FMVSS 208 requirements — they lack airbag integration. Wraps stay street-legal as long as they leave the wheel’s structural integrity intact. Check NHTSA regulations before taking either build on public roads.
Materials and Tools You Need for Carbon Fiber Steering Wheel DIY

Get this list wrong and you’ll waste a weekend. Get it right and the build runs itself.
Carbon Fiber & Resin (Full Build)
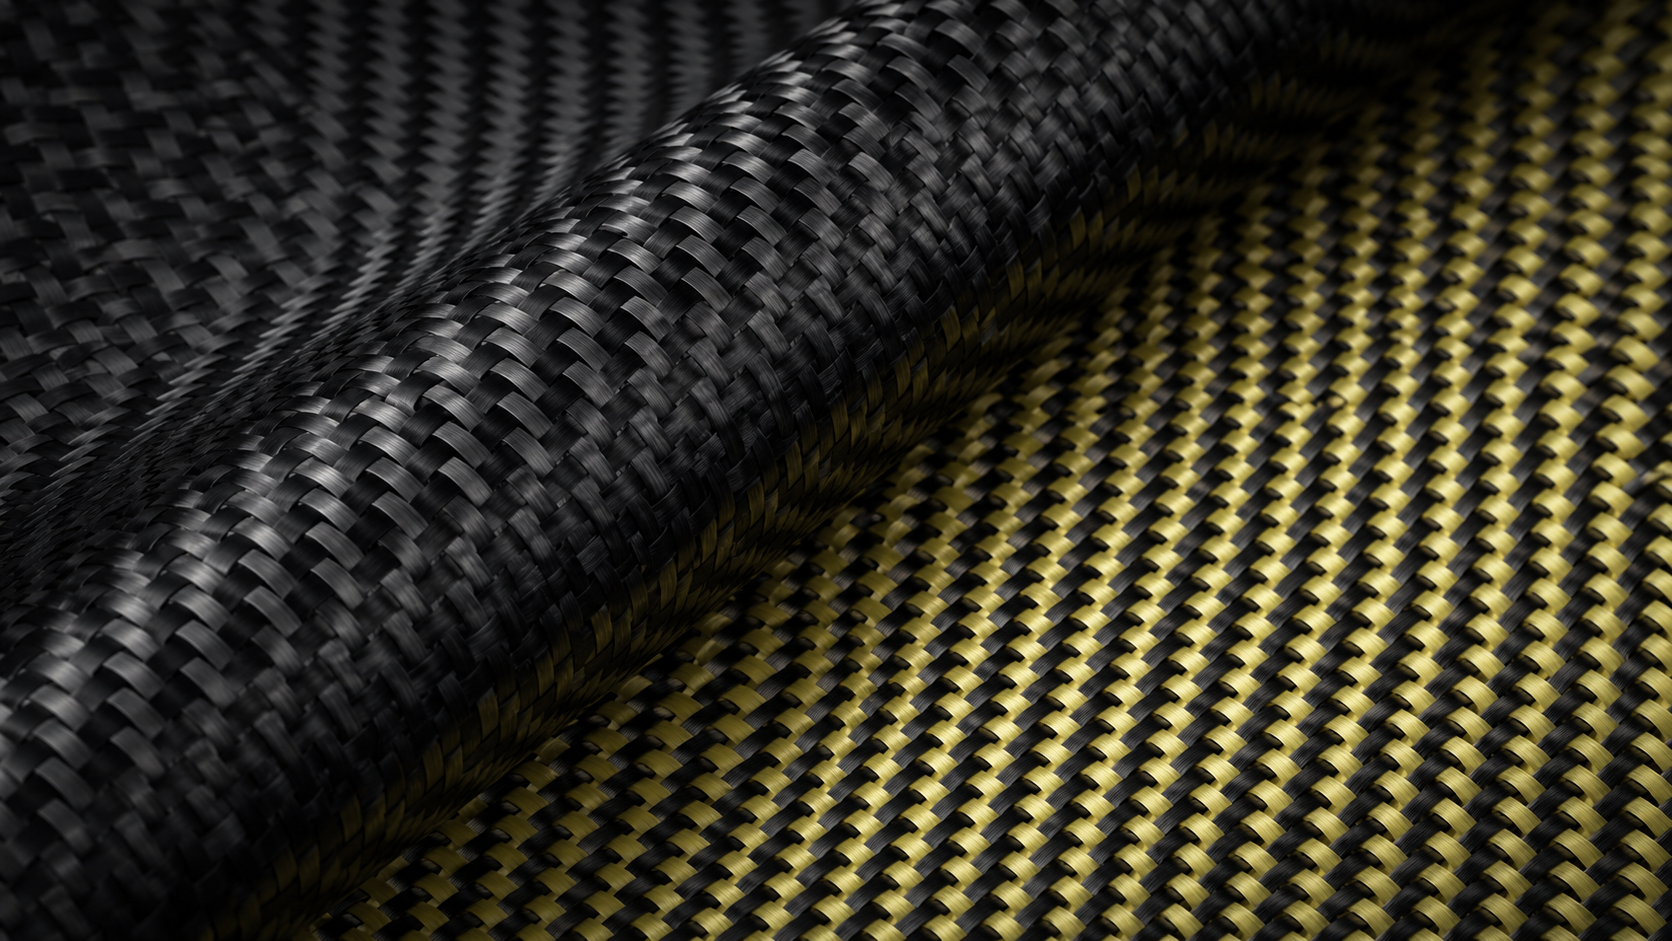
– 3K 2×2 twill carbon fabric — 200 GSM, at least 0.5m². Black twill is the standard; Kevlar weaves add color if that’s your thing
– Epoxy resin — 2:1 ratio (resin to hardener), automotive-grade. Compositevisions.com stocks solid options worth checking out
– Glass cloth — 2 layers, placed around the carbon on both sides for a cleaner finish
– PVA mold release — Blue PVA, brushed on in multiple coats. After the resin cures, water washes it right off
Tools
– Jigsaw or wet saw for cutting cured carbon
– Angle grinder for trimming excess
– Drill press with 5mm bits — you’ll need a precise 70mm 6-hole bolt pattern
– Brushes and rollers for resin wet-out
Safety — Non-Negotiable
Grab nitrile gloves (8mil minimum), ANSI Z87.1 goggles, and set up proper ventilation before you start. Epoxy fumes build up fast in a closed garage. Don’t skip this step.
For Wrap Builds: Pick up 3K twill vinyl, automotive double-sided tape, and leather or Alcantara for the grip sections.
Step 1: Design Your Carbon Fiber Steering Wheel (CAD & Template Prep)
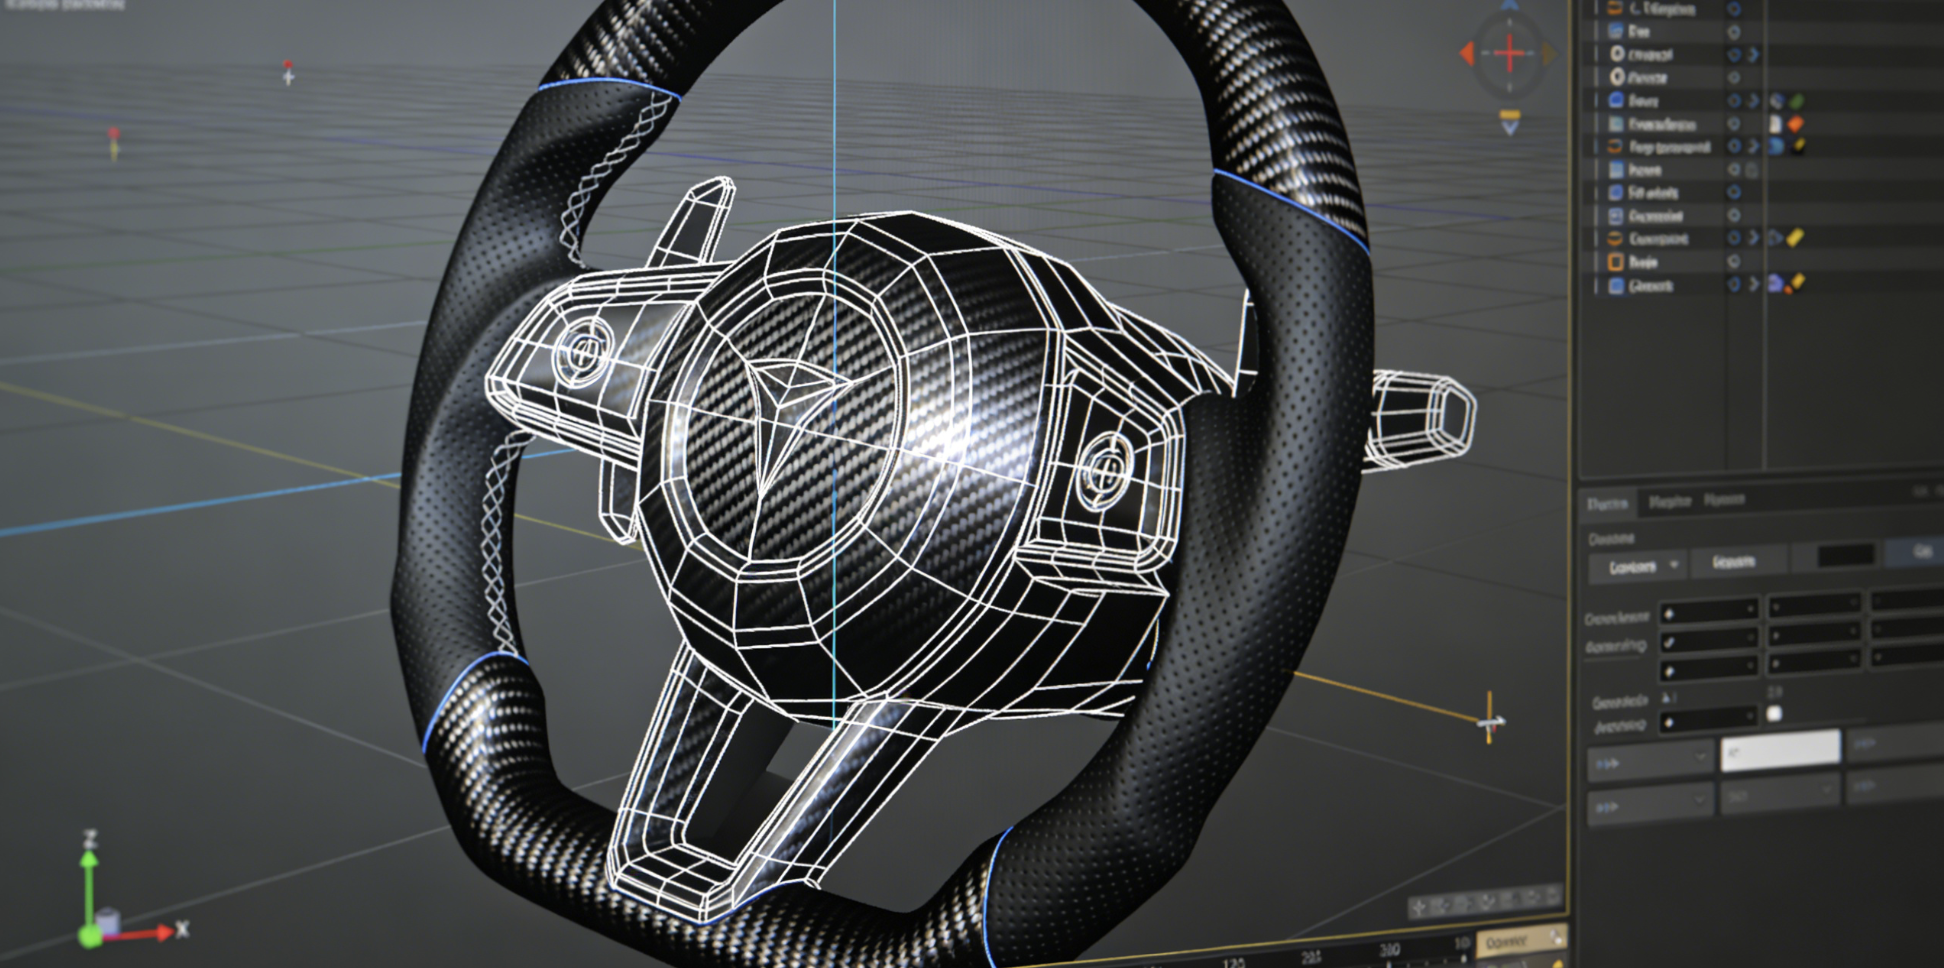
Every build lives or dies in the planning phase. Skip the design work and you’re guessing — wrong bolt spacing, awkward grip thickness, a wheel that never fits your hands.
Open Fusion 360 and lock in these numbers first:
-
Diameter: 10 inches (254mm) — standard Formula/GT3 spec
-
Wall thickness: 5.5–6mm carbon layup
-
Bolt pattern: 70mm PCD, 6-hole — fits most quick-release hubs
For the grip, trace your actual hand. Use a hand mold or 3D scan your existing wheel to pull the geometry. Print a grip prototype at high resolution, test it, and adjust. Thumb supports go in at this stage — not later.
Free templates worth bookmarking:
– Printables Formula/GT3 model
– Thingiverse carbon wheel model
Grab either one and load it into Fusion 360. Edit the center and grip sections to match your specs. Then export your STL files for printing. Also, drill alignment holes into the rear face. They keep the backing plate lined up during layup — and save you a lot of trouble down the line.
Step 2: Prepare Your Mold for Carbon Fiber Layup

Mold prep is where most first-time builds fail silently — not during layup, not during cure.
Start with a clean surface. Wipe the mold with solvent and a lint-free cloth. Leave zero residue. Then lay a grid of blue painter’s tape at 10–20mm spacing across the mold face. This spreads your release agent evenly across the surface. You also get clear alignment lines to follow during layup.
PVA release agent: 6 coats minimum.
-
Let each coat dry 15 minutes before applying the next
-
Use a fresh lint-free cloth for every coat — contamination kills adhesion
-
First coat goes on at 500g/m² (about 0.5mm thick)
-
Final coat needs a full 60 minutes before you touch anything
Or go with wax release instead. 3–4 thin sprays of wax release (RW4 works well), with 5–10 minutes dry time per coat, gets the job done just as well.
Check mold flatness before you start laying carbon. Run a straightedge across the surface. You want less than 0.05mm deviation. Anything beyond that traps air — and air means bubbles in your finished panel.
Step 3: Carbon Fiber Layup – Wet Lay Technique Explained
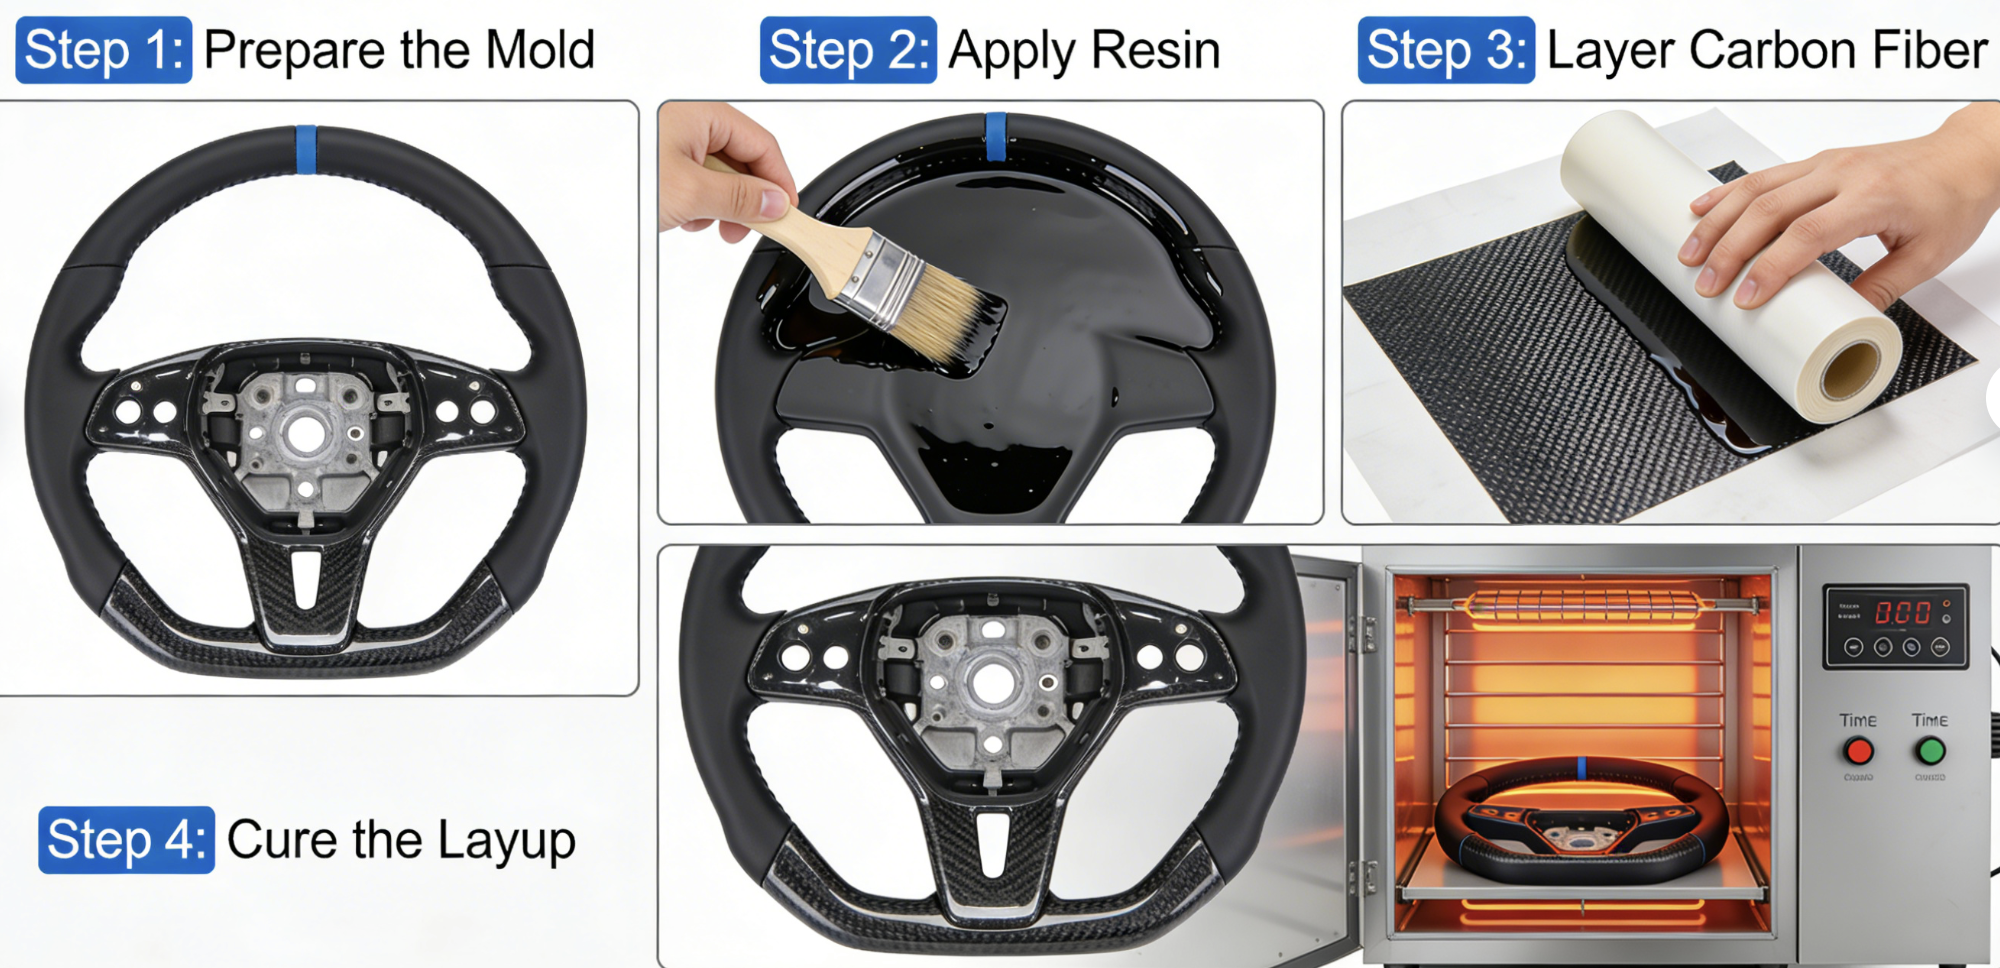
Wet layup is what it sounds like — resin goes down, fiber goes in, repeat until you have a part.
The sequence follows lasagna logic: Resin → Glass → Resin → Carbon → Resin → Carbon → Resin → Glass. Start with a gelcoat base (0.02–0.04 inches) poured onto your prepped mold. That thin layer becomes your finished outer surface. Take it seriously — it shows every flaw.
Glass layers sit on the outside. They wet out easily. They’re also translucent, so you can spot voids and fix them before they harden into permanent problems. Carbon handles the structural work in the middle — that’s where the strength lives.
Target ratio: 60% fiber, 40% resin by weight. Push resin above 40% and your part gets heavy and weak. Drop below it and you get dry spots. After every layer, run a roller or squeegee across the fabric. Stop when the fabric turns translucent. That’s full saturation confirmed.
Work fast. Epoxy has a pot life, and it shortens in warm shops.
Common mistakes that ruin the layup:
-
Too much resin — squeegee the excess out right away, or vacuum bag it
-
Dry spots — hit those areas with a targeted brush and fresh resin, don’t guess
-
Bubbles between layers — roll from center outward, every time
Vacuum bagging after layup improves laminate strength by up to 20%. It’s not required. But a steering wheel takes real load through every corner — vacuum bagging is the right call.
Step 4: Curing, De-Molding, and Rough Shaping
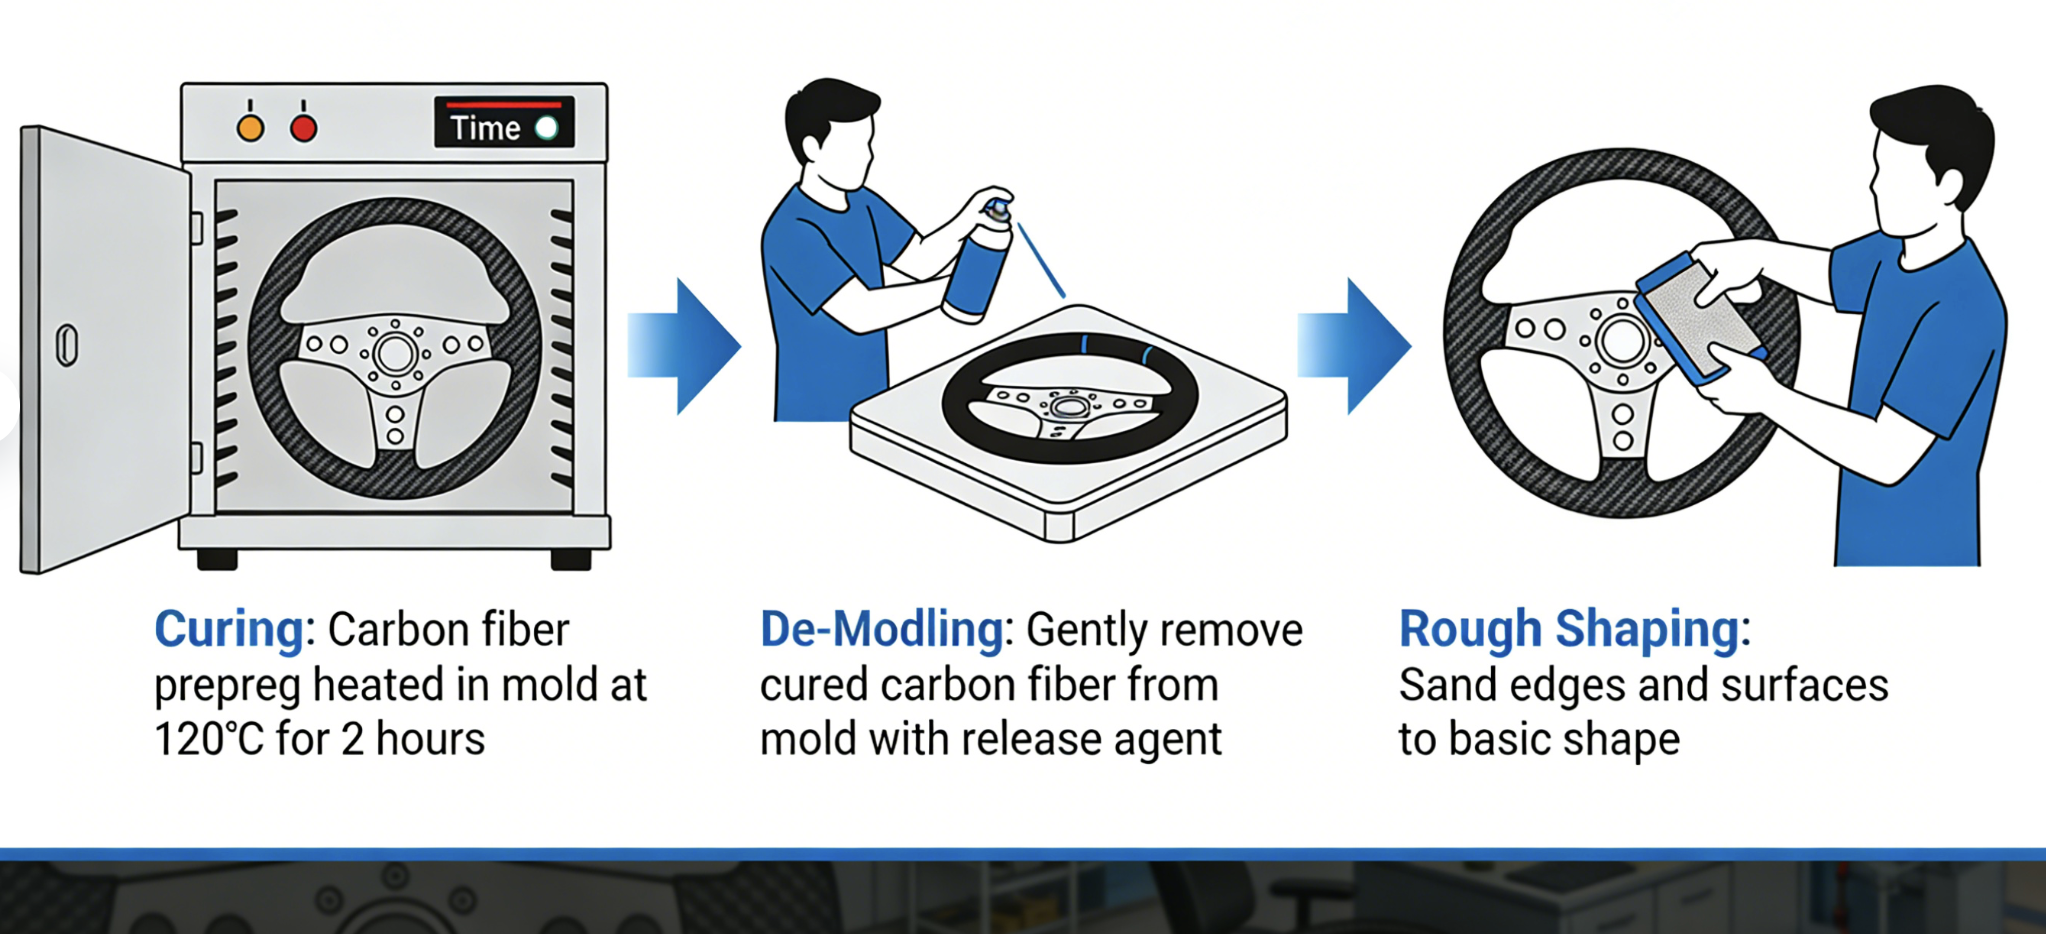
Patience does more work here than your hands do.
Curing happens in two stages. Your gelcoat needs about 5 hours at 20°C to hit B-stage — firm, a little tacky, ready for the next layer. Full cure takes 24 hours at 25°C. Pull it out too soon and the part goes brittle. It cracks during demold. The better approach: cure at 40°C for 12 hours. Hot enough to harden the part, cool enough to keep your mold geometry intact.
Demold with care. Let the part cool to room temperature first. Skip this step and you get surface print-through that no amount of sanding will fix. Use plastic wedges only. Go around the perimeter in small steps, lifting each section at the same rate. The release film should peel off in one clean pull.
Rough shaping starts wet. Keep your sandpaper wet the whole time. Dry sanding clogs the paper fast and cuts deep scratches into the surface. Work up through grits to at least 1200. On curved grip sections, use paper alone — no block. On flatter center sections, wrap the paper around a block to hold the surface flat and true. Change your water each time you move to a new grit. Old particles from the last grade will scratch the surface you just finished smoothing.
Skip the heat gun for anything beyond a tiny surface flaw. It can deform the part beyond repair.
Step 5: Drilling the 6-Bolt Pattern and Thickness Verification
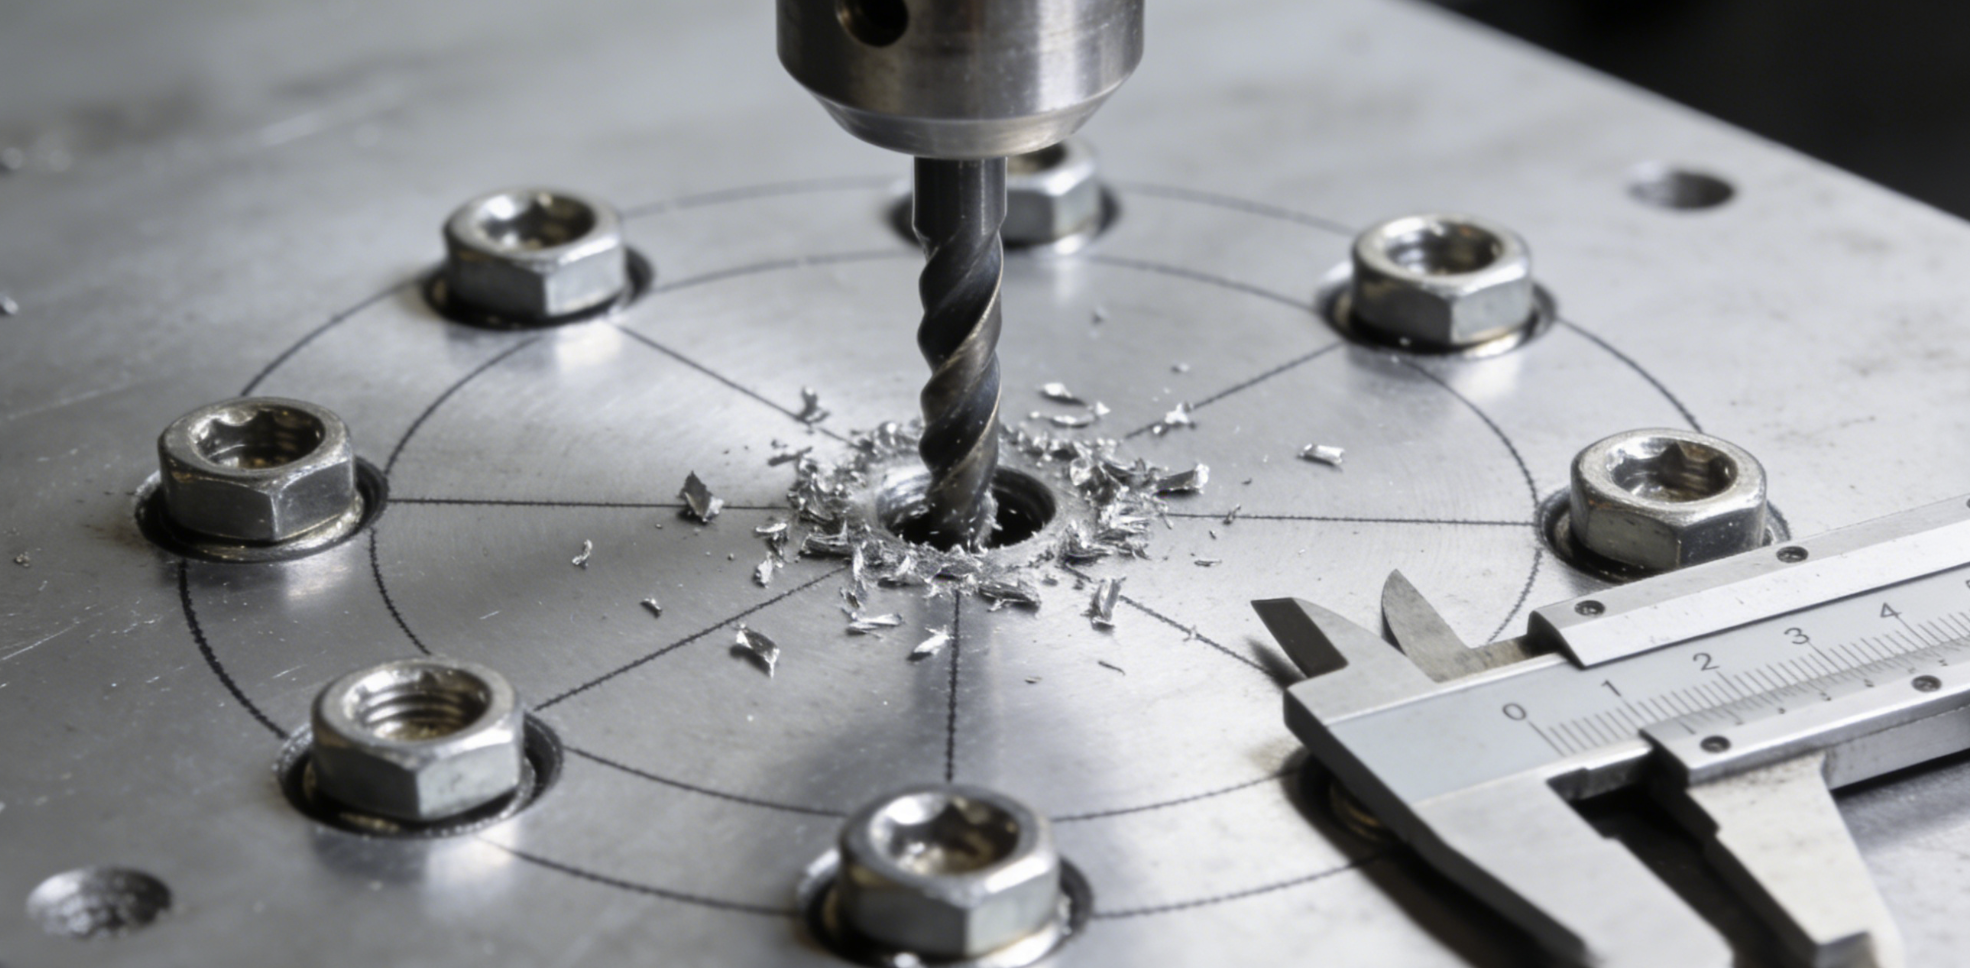
One bad hole wrecks everything you’ve built so far. This step demands precision over speed.
Mark your 70mm PCD using a printed template before touching the drill press. That 70mm figure is your center-to-center distance between opposite holes — not edge to edge. Lock your workpiece down. Drill wander kills accuracy fast.
Follow this sequence in order:
-
Mark all 6 hole positions at 70mm PCD
-
Drill pilot holes with a 4mm carbide bit first
-
Follow with your 5mm final bit — peck drill in 0.5mm increments to prevent delamination
-
Check that opposite hole centers measure 70mm ±0.05mm with calipers
-
Test-fit M6 bolts and torque to 10–15 Nm
Thickness check comes next. Measure at least five points — center plus four edges — with a digital caliper. Target is 5.5mm finished thickness. Below 5.4mm risks load failure. More than 0.2mm variation across the surface means your bolts won’t sit flush.
Delamination during drilling traces back to a dull bit or too much feed pressure. Use a sharp bit, slow feed, and coolant. Those three things keep your layers bonded clean through every hole.
Step 6: Sanding, Finishing, and Polishing Carbon Fiber Surface
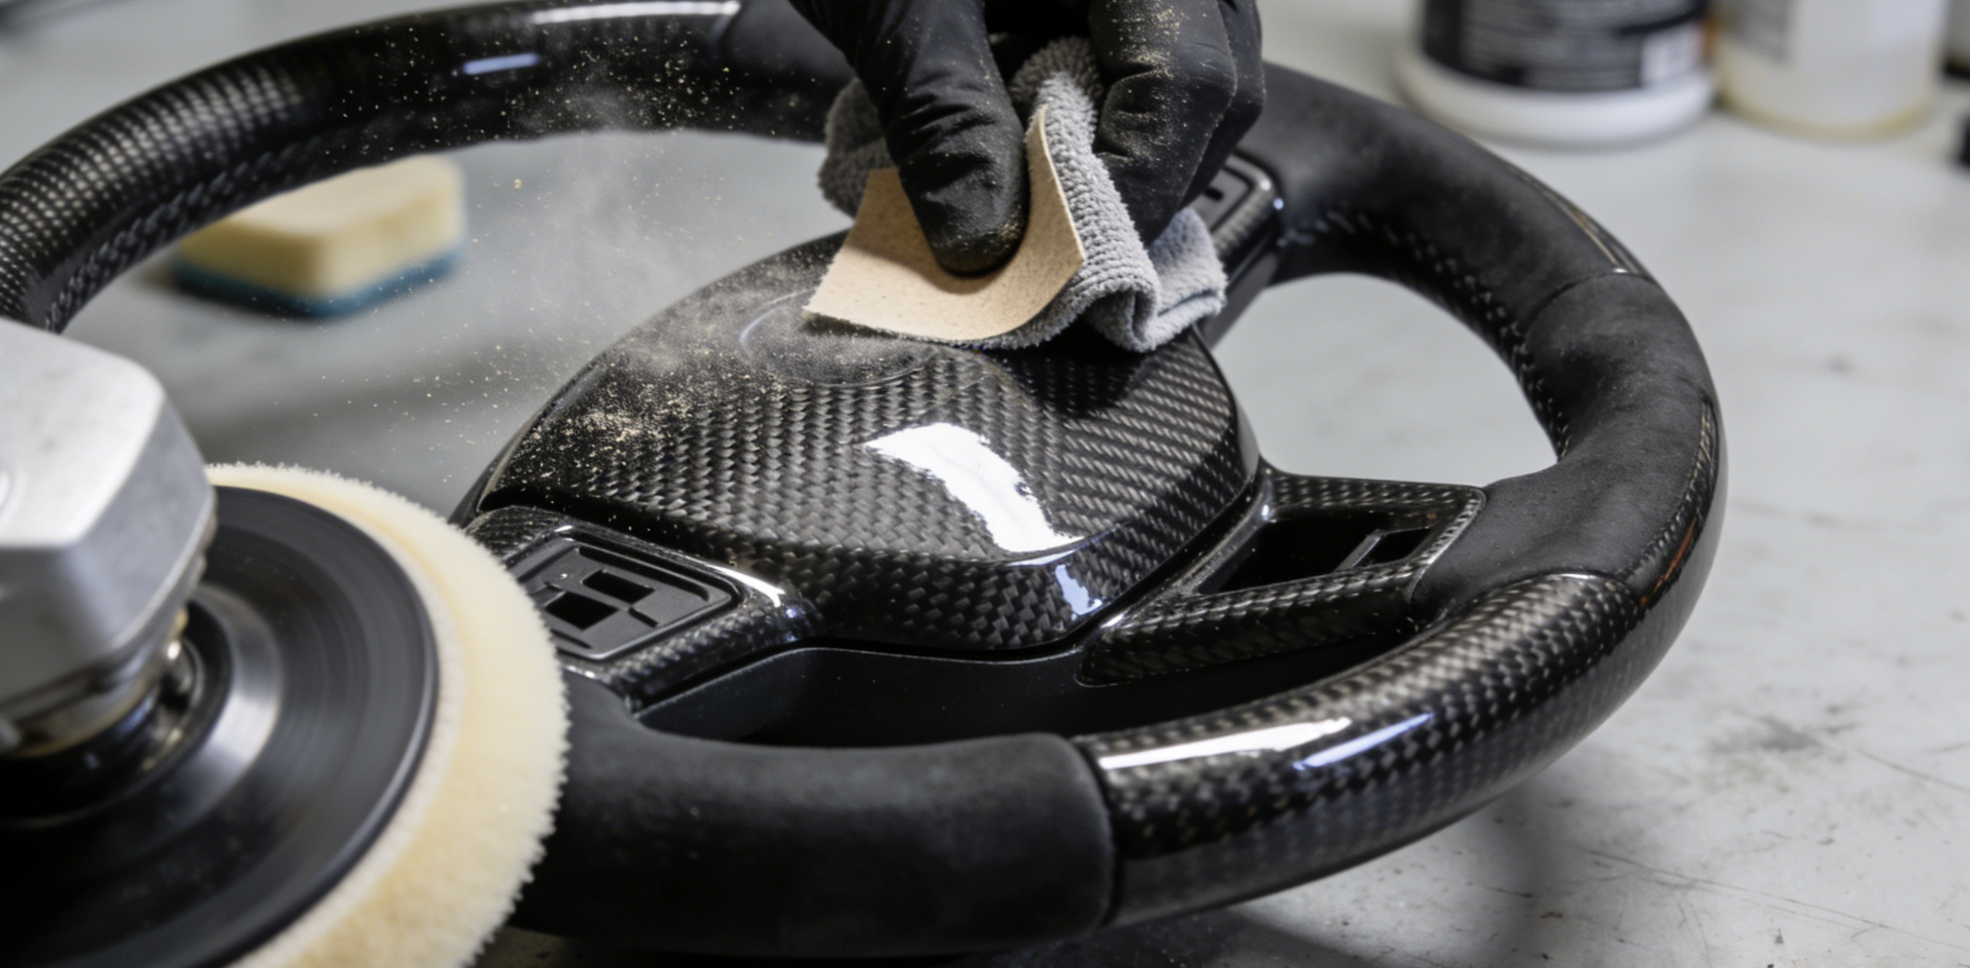
This single step separates a part that looks homemade from one that looks factory-built. Get it right, and the surface speaks for itself.
Work through grits in order — no shortcuts:
-
80–320 (coarse): Remove resin bumps and burrs. Hold your angle grinder at 15°–30°. This protects the fibers underneath from separating.
-
400–600 (medium): Wet sand to level uneven epoxy. Keep both the surface and the paper soaked the whole time.
-
800–1200 (fine): Stay under 3000 rpm. Keep contact pressure below 5N/cm². Go light — let the abrasive do the work.
-
1500–4000 (ultra-fine): Hit every grit before you touch a polishing compound. Skip one, and you get scratches that compound alone cannot remove.
One rule covers everything: spot the carbon fiber weave showing through at any point — stop. Add a thin epoxy coat, let it cure, then pick up sanding from that same spot. Rushing past this causes permanent damage.
Fill pinholes with two-part epoxy. Re-sand after it cures. Use a tack rag between every grit change — slurry buildup will scratch the surface you just worked on.
Want matte? Stop at 800 grit and lay down a satin clear coat. Want gloss? Polish up from 1200. Both finishes look sharp and deliberate — as long as the grit progression stays clean.
Step 7: 3D Printed Grips – Design, Print, and Attach
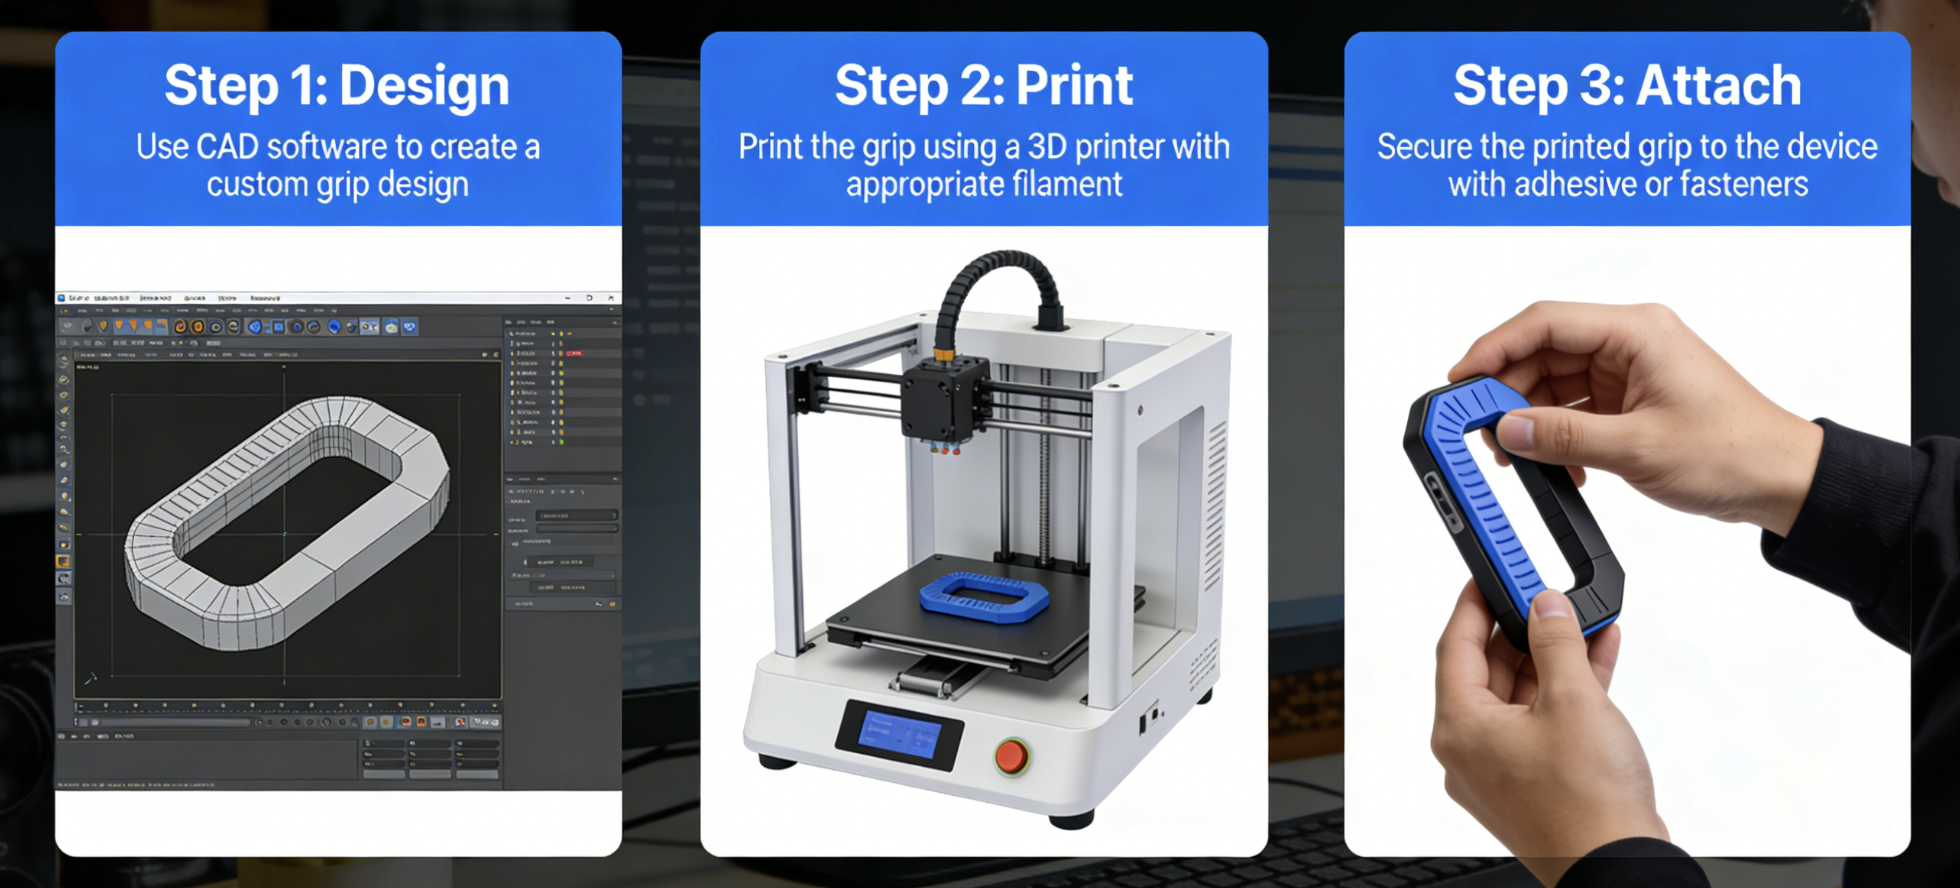
The grip is where your hands live. Get it wrong and no amount of glossy carbon fiber saves you.
TPU is the right material for this. Not ABS, not PETG. TPU gives you that spongy feel that kills hand fatigue on long stints. Keep walls at 2mm, run low infill, and use a gyroid pattern. Thicker walls make it stiff. Stiff defeats the purpose.
Design to 28–32mm grip diameter. Add a thumb recess at 10–15% forward extension. That one small detail cuts fatigue by 20–30%.
Print settings that matter:
– Low infill, minimal walls — sponginess is the goal
– Enable supports, but use X-ray preview to minimize them
– Export high-resolution STL — pixelation creates weak points
Scale your mesh up 25% if the initial fit feels tight. You want full wrap-around with zero deformation.
To attach: align the grip to your carbon core. Check clearance. Then compression-test by hand before you commit. It needs to survive 500N of squeeze without cracking. Pass that test, and it’s ready.
Lead time? 1.5 days versus 18 days for machined grips. That number says everything.
Step 7B (Wrap Alternative): How to Wrap a Steering Wheel in Carbon Fiber
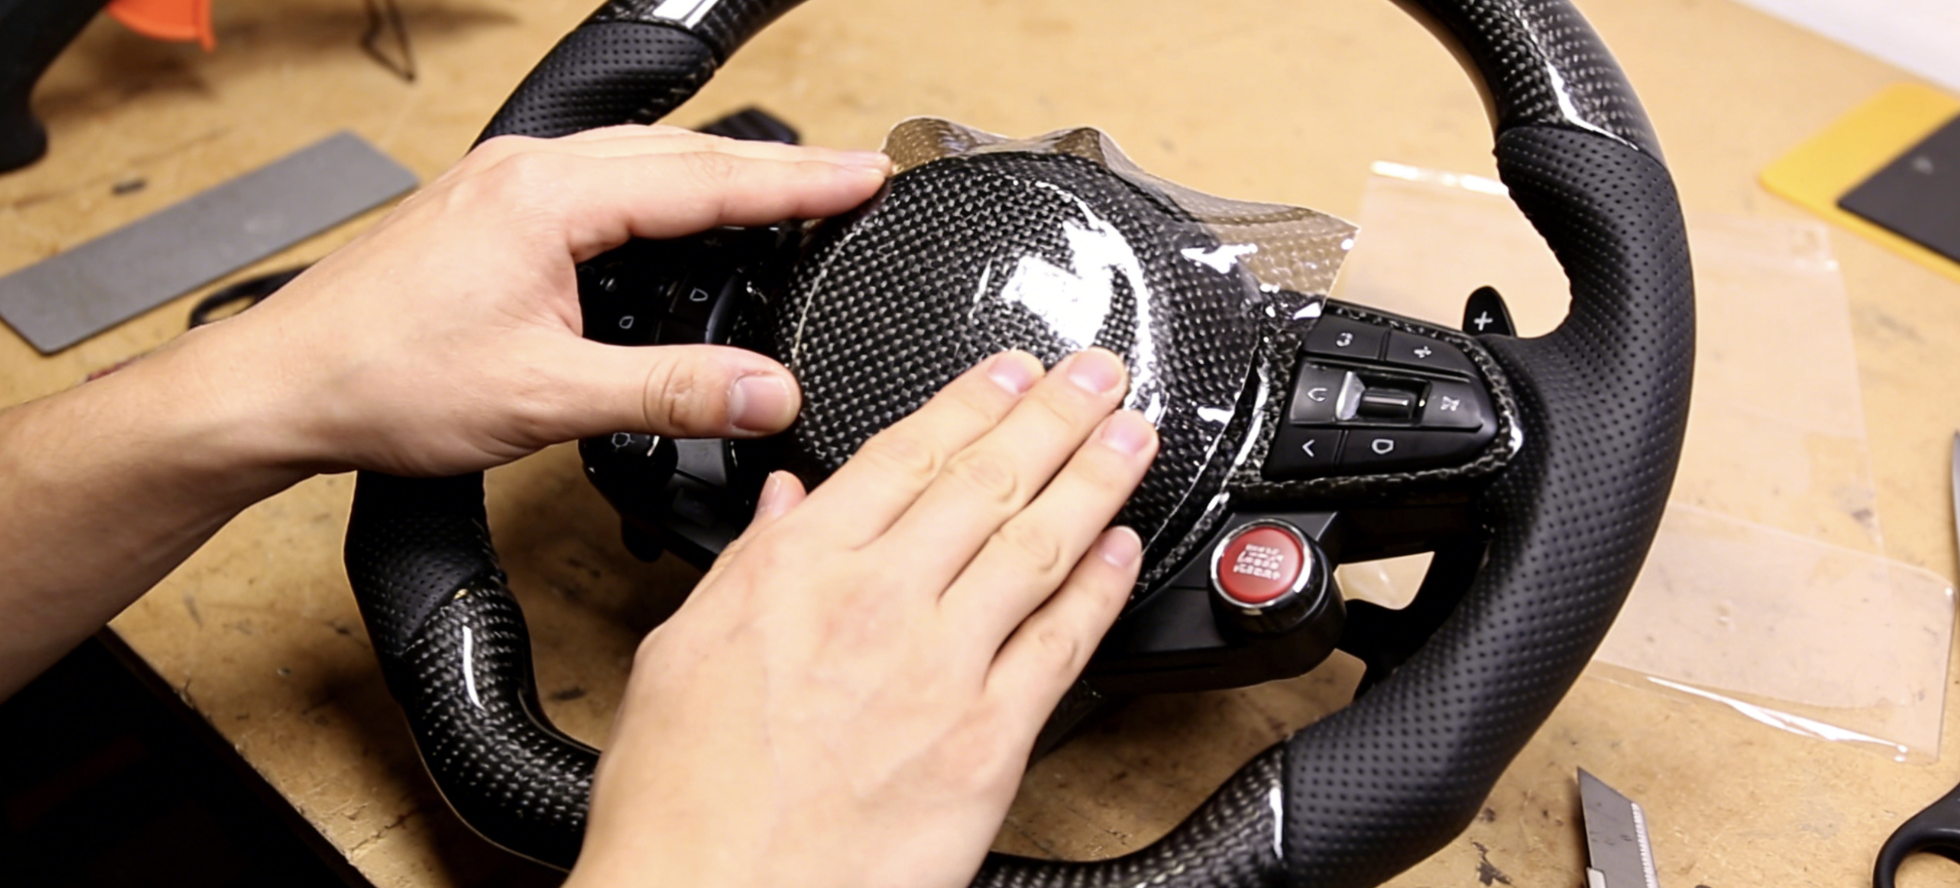
Wrapping beats waiting. No full build right now? Budget, time, or skill holding you back? This method puts real carbon fiber texture on your existing wheel in a single weekend.
Fabric Prep and Resin Saturation
Use two layers of 3K twill carbon fabric per grip section. More thickness means more material to sand back into a clean surface after cure. Lay both layers face-to-face on plastic sheeting. Pour resin into the center. Spread it with a rubber roller and work outward. Run a heat gun across the surface — bubbles rise and pop. Roll out the excess. Trapped air kills the finish here.
Positioning and Compression
Use the plastic backing as a carrier to slide the saturated fabric into position. Peel the backing away in one smooth motion. Wrap shrink tape around the entire surface to hold everything in place. Hit it with a heat gun. The tape contracts, compresses the laminate, and pushes out excess resin. Same principle as vacuum bagging — no equipment needed.
Before You Apply Anything
-
Clean the wheel surface — any grit under the carbon causes adhesion failure
-
Mark your 12 o’clock position on both wheel and fabric before touching the material
-
Stretch with light, even pressure. Forcing the fabric creates permanent wrinkles
After Cure: Trim, Patch, Finish
Remove the shrink tape. Sand the surface smooth. Patch thin spots with fresh resin and fabric, then re-tape those sections. Tuck seams along spokes with a plastic tool. Run both hands around the full circumference. Press out any remaining wrinkles before the surface hardens and locks in.
Step 8: Safe Installation – Airbag, Torque Specs, and ESP Alignment
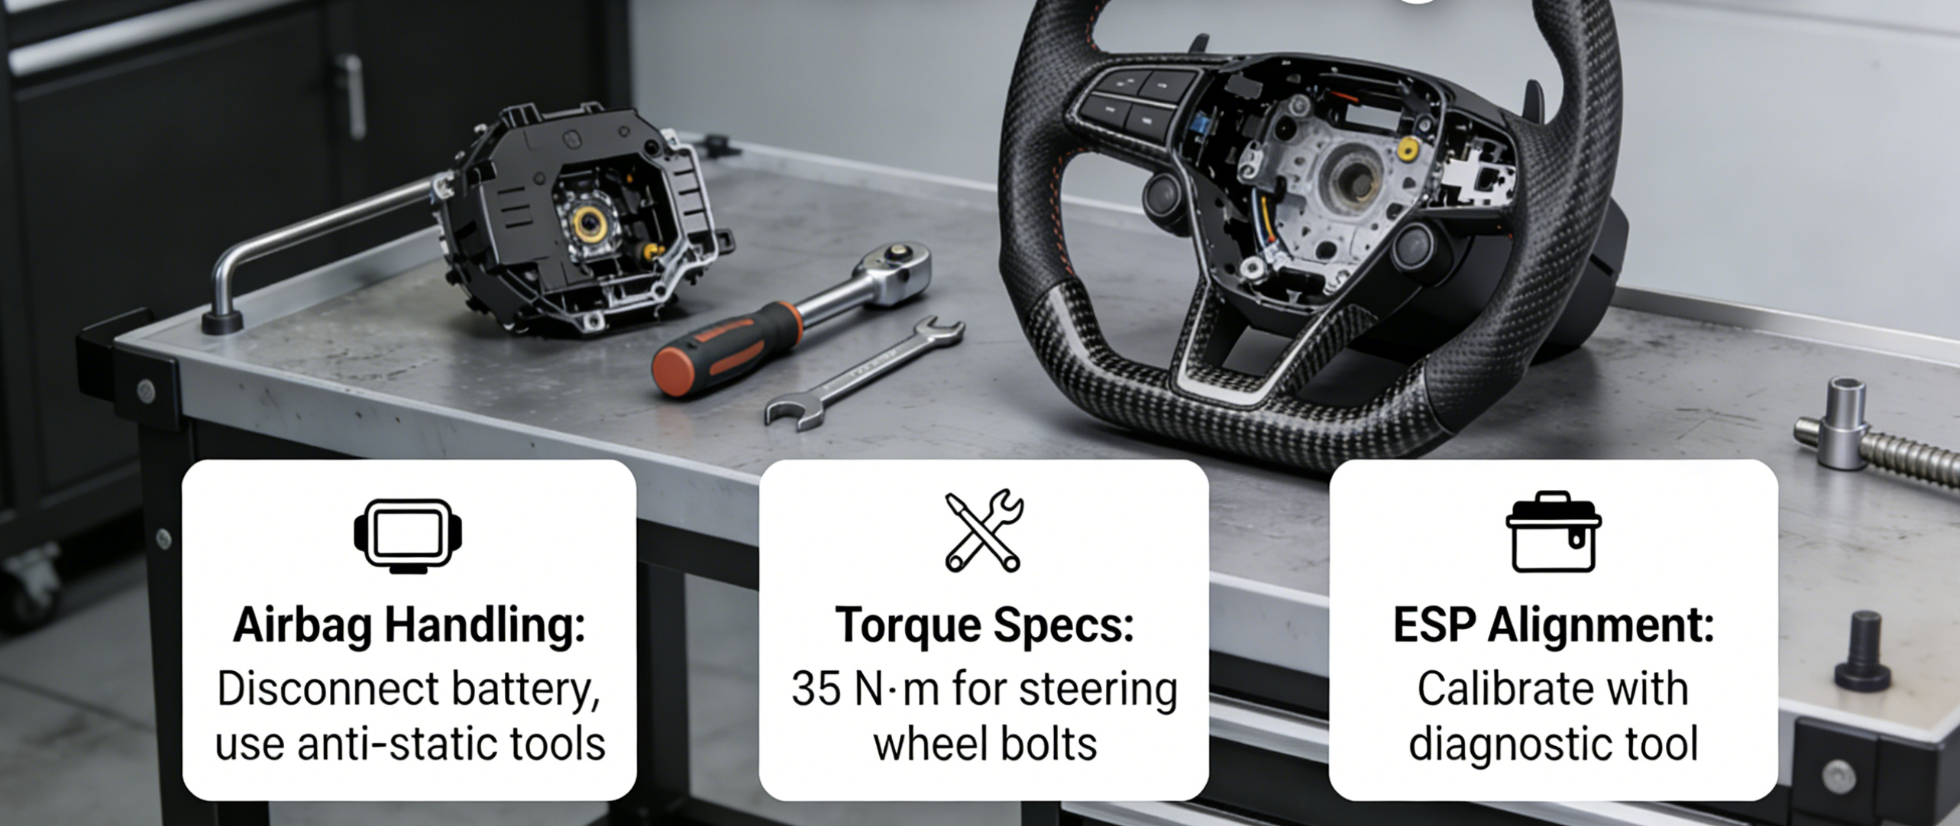
A misaligned steering wheel doesn’t just feel wrong — it confuses your car’s brain.
Disconnect the battery negative terminal first. Then wait a full 15–20 minutes. This gives the airbag capacitor time to discharge its stored energy. Skip that step, and you’re gambling with accidental deployment — burns, shrapnel, a ruined build.
Remove the airbag module using Torx T40 screws (2–4 screws, depending on your car). Counter-hold the module to stop it from rotating. Never probe the connectors. Use insulated tools for this job.
Torque specs matter here:
|
Component |
Torque |
Thread Locker |
|---|---|---|
|
Center bolt |
40–50 Nm + 90° angle tighten |
Loctite 243 required |
|
Airbag screws (T40) |
8–10 Nm |
None — dry install |
Most DIY guides skip ESP alignment. Don’t make that mistake. Seat the alignment pins before you torque anything down. Even 1° of steering offset produces 10–15% yaw error — enough to trigger false braking mid-corner. That’s a serious safety risk on the road.
Once the battery is back on, clear DTCs through your OBD tool. Check that yaw rate reads under 0.5°/s at standstill. Steering angle needs to show 0° dead center. Both readings confirm your setup is correct.
Carbon Fiber Steering Wheel DIY Cost Breakdown 2026
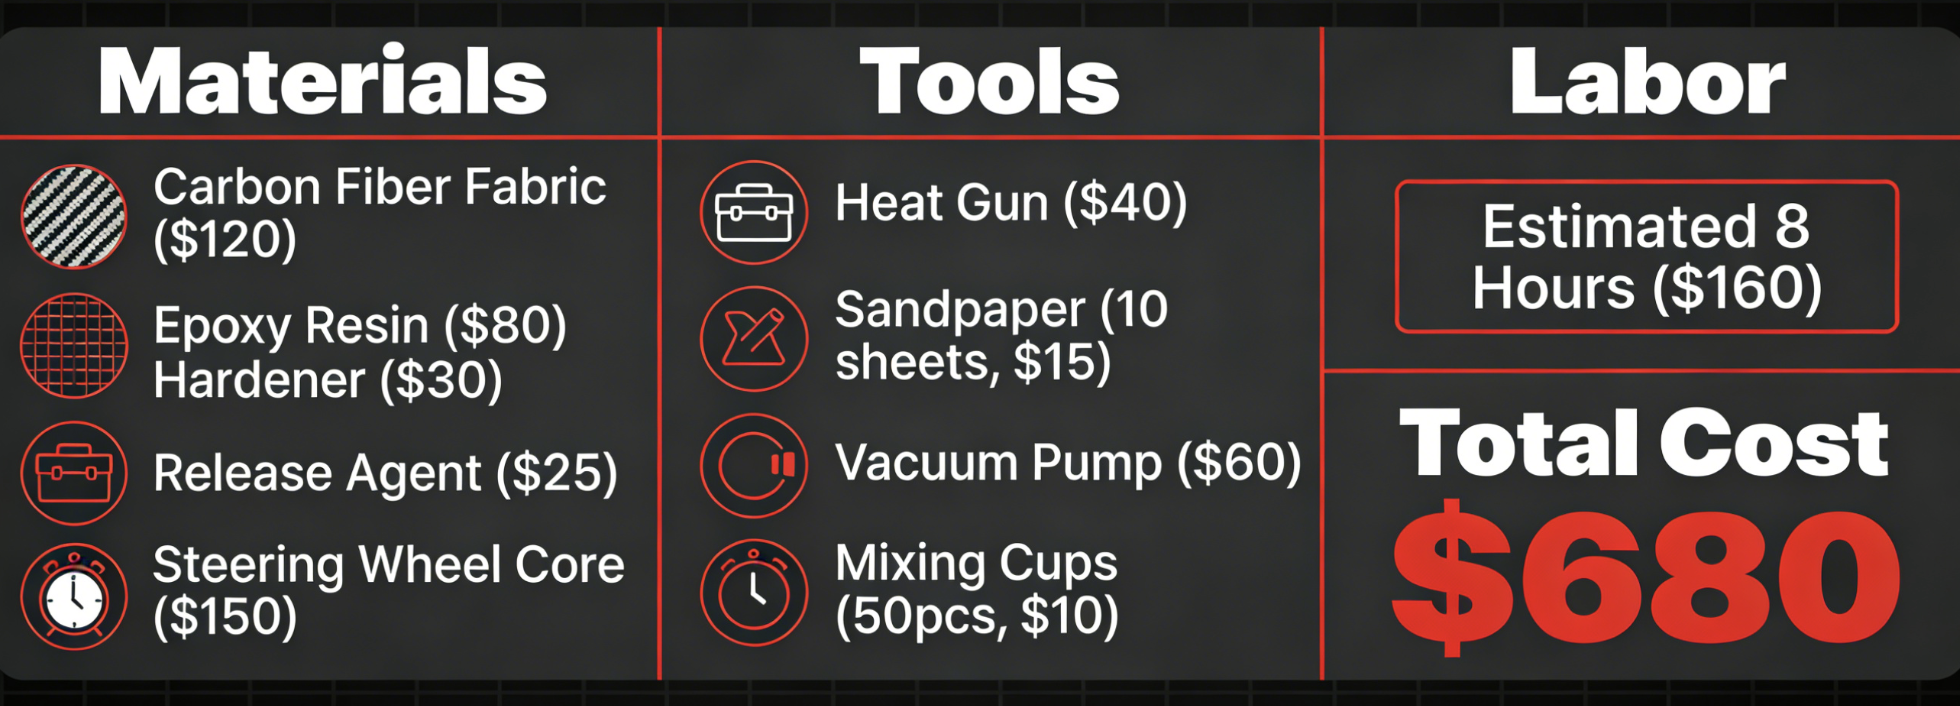
The math is blunt. A comparable wheel sells for $499 minimum — often $999 or more. Your full build runs between $150 and $400 in materials. The tools? They pay for themselves on every future carbon project.
Full Build (2026 estimates)
– Carbon fiber fabric (0.5–1 sqm twill): $40–80
– Epoxy resin + hardener (1L kit): $30–50
– Mold materials + release agent: $20–100 (silicone molds drop to ~$10–20 per wheel after five pulls)
– Tools — heat gun, vacuum bag, sandpaper: $40–80 spread across projects
– Hub adapter: $20–50
– Grand total: $150–300, or ~$400 with a forged carbon upgrade
Wrap Build
– Carbon wrap kit + Alcantara hybrid: $20–25
– Tape, thread, wipes: $5–6
– Grand total: under $30, plus 2–3 hours of your afternoon
The savings stack up fast. Leftover fabric goes straight to future intake wraps. Molds do double duty on body kit sections. One build puts real skills in your hands — skills worth $200–400 in pro labor you won’t need to pay. Plus, you cut costs by 30–50% on every carbon mod that comes after.
Common Mistakes and How to Avoid Them (Carbon Fiber Layup Troubleshooting)

Most failed builds don’t fail during layup. They fail because of decisions made three steps earlier that nobody caught in time.
Here’s what goes wrong — and the specific numbers that prevent it:
-
Delamination: Vacuum pressure dropped below 25 inHg, or the cure ramped too fast. Hold ≥25 inHg throughout the entire cure. Ramp to 120°C at 2°C/min. Then hold for two hours.
-
Voids: Air didn’t fully evacuate. Maintain ≥28 inHg for 30–60 minutes per ply. Check bag integrity before every pull.
-
Wrinkles: Fiber buckles over curved geometry. Keep 5–10 N tension during placement. Cut plies within ±2mm of the actual surface shape.
-
Resin-rich zones: Too much resin pools where fiber volume drops below 50%. Target 35–45% resin content using rollers. Prepreg holds this to ±2% consistency.
-
Fiber shifting: High-viscosity resin pulls fibers out of position during infusion. Keep resin below 500 cP. Lock edges with tackifier before infusion starts.
-
Warping: Asymmetric stacking makes the part curl during cure. Mirror your ply sequence about the neutral axis. Cure at 80–100°C with no more than ±5°C gradient across the part.
One number to commit to memory: fiber misalignment beyond 5° drops strength by 20–30%. Use laser alignment to verify orientation before infusion — not after.
Contamination does just as much damage. A dirty layup causes bond failures 50% of the time. Clean every surface with IPA, down to under 1% residue, before the first ply touches the mold.
FAQ: Carbon Fiber Steering Wheel DIY (2026 Updated)
Real questions from builders who’ve stood in the garage, part in hand, not sure what comes next.
Is a DIY carbon fiber steering wheel street-legal?
Full carbon builds don’t meet DOT/FMVSS 208 standards — no airbag integration. Track use only. A wrap over your stock wheel, though? That stays street-legal.
What skill level do you need?
Basic mechanical confidence is enough. Swapped brake pads before? You can handle this. The control module transfer is simple — eight screws, all in the same factory spots.
How long does installation take?
Active work runs 15–30 minutes. The waiting — battery discharge, resin cure — eats more time than your hands do.
What’s the real cost?
– Full build: $150–$400
– Wrap: under $30
Either way, you’re keeping hundreds in your pocket.
Do I need special tools?
Just three things:
– Allen keys
– A six-point socket
– A thin flathead for the airbag clips
Nothing unusual.
One thing most guides skip?
The steering shaft has a flat spot. Your wheel seats one way — and one way only. Check alignment before you force anything. Misalignment causes damage that sanding and polishing won’t fix.
Conclusion
You’ve just learned what most shops charge $1,500 to keep secret.
Building a carbon fiber steering wheel from scratch isn’t just for pro fabricators or race teams with big budgets. It’s a skill anyone can learn. Start with a mold, a bolt of 2×2 twill, and the patience to let epoxy cure on its own schedule — not yours.
The real win isn’t just a lighter steering wheel. You now have the carbon fiber layup process in your hands. Use it on every intake, splitter, and body panel you build next.
So here’s your next move: pull up your CAD template, order your materials from a trusted supplier, and commit to the build. The wrap method is a solid entry point too. No shame in starting there — it’s a real, proven method.
Contact HyperX Carbon – Your Trusted Chinese Carbon Fiber Partner
Ready to source high-performance carbon fiber materials or custom forged carbon fiber parts from China?
HyperX Carbon is a leading manufacturer with 20+ years of expertise, specializing in aerospace-grade forged carbon fiber, prepreg, carbon fiber tube, carbon fiber sheet, and lightweight carbon fiber automotive parts/carbon fiber drone components/carbon fiber medical components. We offer:
-
Stable supply chain with premium raw materials (Toray, Mitsubishi, Hengshen)
-
AS9100D certified production for aerospace & UAV applications
-
Rapid prototyping (5-8 weeks) and monthly capacity exceeding 180,000 parts
-
Competitive pricing with 15-18% cost savings on forged carbon solutions
-
Full customization: from T700/T1100G to ultra-high modulus grades
Whether you’re an eVTOL developer, automotive OEM, drone manufacturer, or medical device engineer, HyperX delivers consistent quality, batch-to-batch reliability, and reliable delivery.
Get in touch today for a free consultation, custom quote, or material sample.
📧 Email: [email protected]
🌐 Website: https://www.hyperxcarbon.com/
📞 Phone/WhatsApp: +86 15623270276 (English support available)
Let’s build your next lightweight innovation together – contact HyperX Carbon now and stay ahead in the low-altitude and advanced composites market.