Your carbon fiber hood just cost you serious money — the last thing you want is to watch it peel off at 80mph on the highway. Yet every day, car enthusiasts bolt on a carbon fiber hood and never give hood pins a second thought. Sometimes that’s fine. Sometimes it ends with a $1,200 hood wrapped around your windshield.
Knowing which situation you’re in separates a smart build from an expensive mistake. This guide cuts through the forum noise. You get a straight answer on whether you need hood pins for your carbon fiber hood. It breaks down the real installation process without destroying your investment. Plus, it helps you pick the right hardware for your specific setup — street cruiser, weekend track car, or anything in between.
Do You Need Hood Pins for a Carbon Fiber Hood? (The Direct Answer)
Short answer: yes, and Seibon Carbon backs this up — they recommend hood pins for every aftermarket carbon fiber hood they sell. That includes OEM-style fitments on the WRX/STI and Civic Type R.
Here’s the physics problem most people miss. Your factory steel hood weighs 30–50 lbs. That mass pushes back against lift. Your carbon fiber hood weighs 10–15 lbs. It also flexes under aerodynamic load. At 100+ mph, wind tunnel testing shows 200 to 400 lbs of upward force hitting a latch system built for a hood three times heavier. That’s a real mismatch.
The failure rate without pins runs 25–40% higher above 100 mph. That’s not a forum guess. That’s measured data.
Between 2018 and 2025, 12 documented detachment incidents happened above 120 mph. A VW Golf R lost its hood at 140 mph on a track day — total damage: $8,500. A Nissan 370Z shed its hood on the highway: $4,200, gone in seconds.
Your carbon fiber hood cost $1,000–$2,500. Hood pins run far less than that. The math is simple — pins are cheap insurance against a very expensive mistake.
Hood Pins: Essential or Optional? Here’s the Real Breakdown
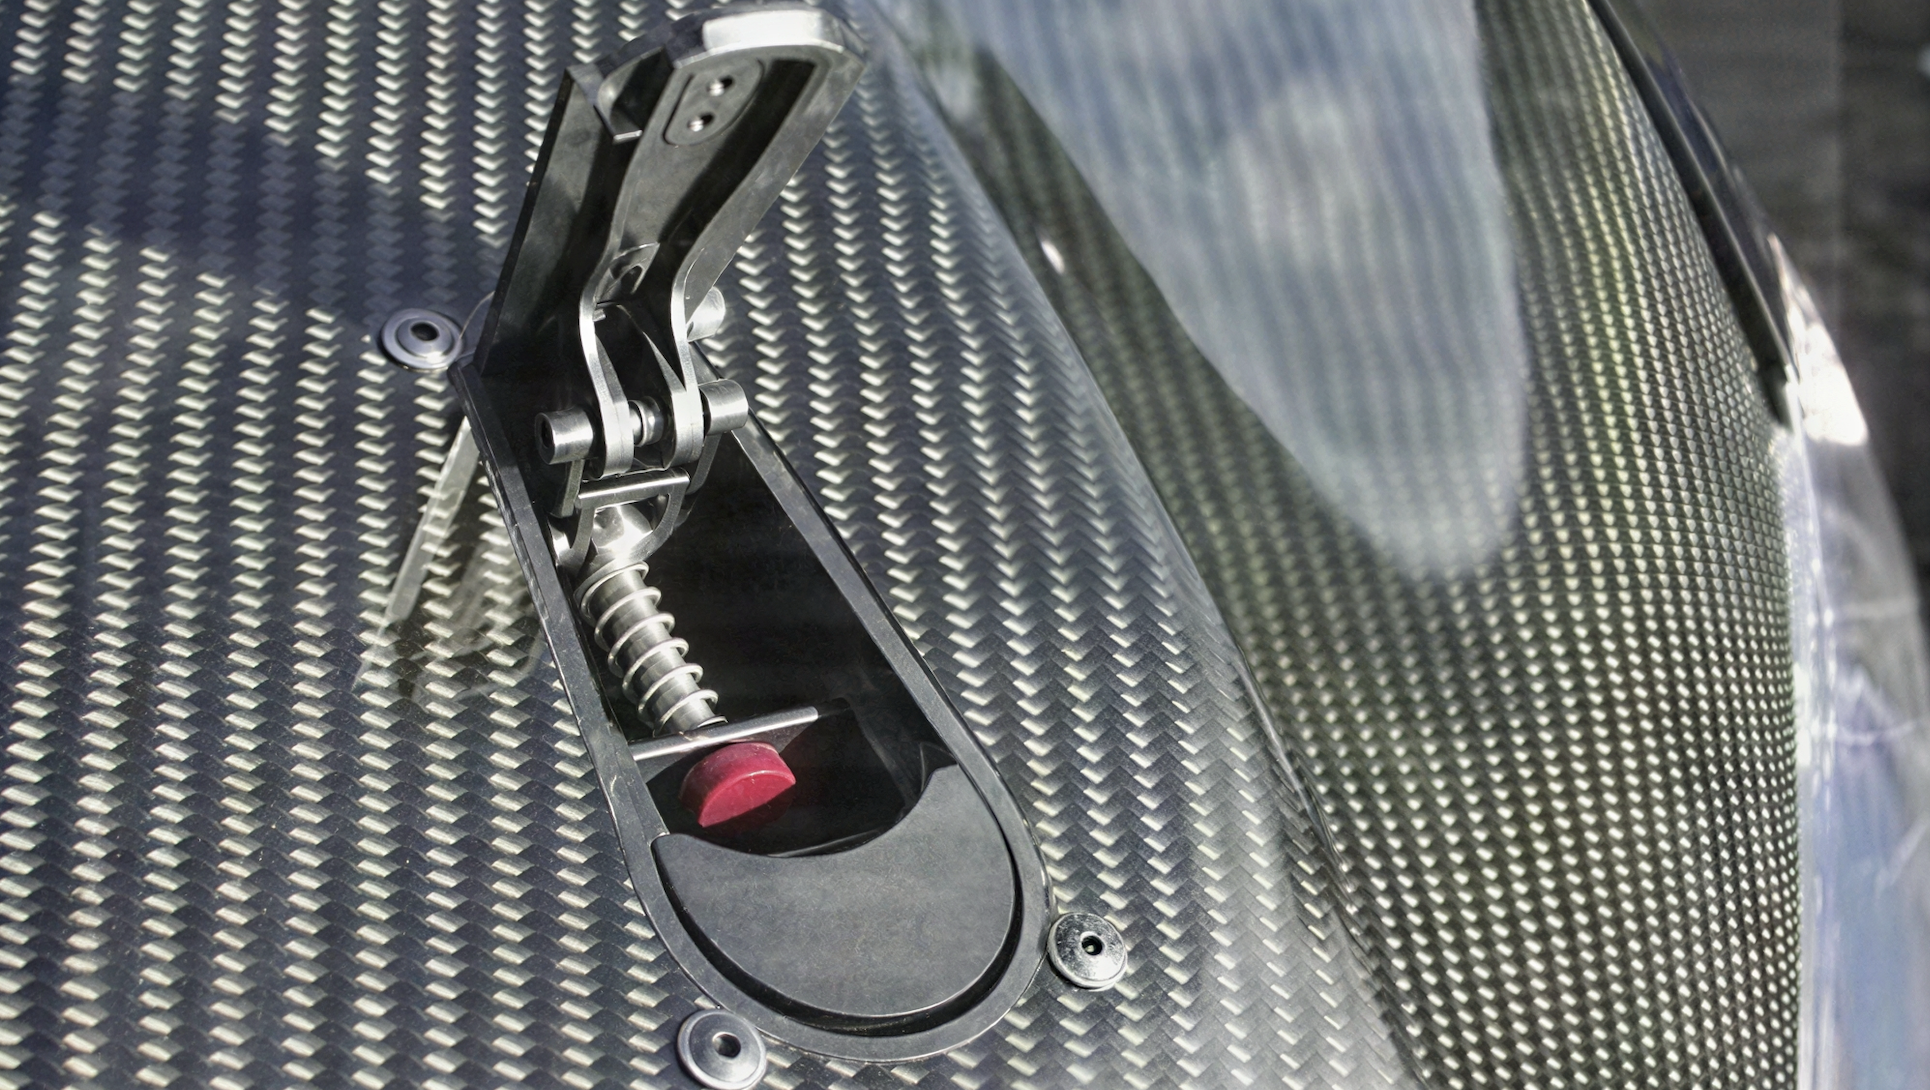
The answer depends on your hood type and where you drive. There’s no single rule that fits every situation.
Here’s the key split most people miss:
Carbon fiber and FRP aftermarket hoods have two layers — a top skin bonded to a bottom skeleton. Repeated aerodynamic stress weakens that bond over time. At speed, the top skin can separate and fly off while the skeleton stays latched. Your OEM mechanism holds the skeleton. Nothing holds the skin. Hood pins exist to stop that exact failure.
A factory steel or aluminum hood? That’s single-piece construction. No delamination risk under normal use. Hood pins are optional on those.
Your Scenario, Your Answer
|
Use Case |
Hood Pins Needed? |
Why |
|---|---|---|
|
Street / daily driving under 60 mph |
Optional |
Aerodynamic lift stays low; OEM latch handles it |
|
Highway / freeway driving |
Essential |
A Miata hood popped open at freeway speed — a backup latch was the only thing that stopped full detachment |
|
Track days / racing |
Non-negotiable |
High-speed airflow plus crash forces create the exact delamination scenario described above |
Aerodynamic lift forces rise fast past 60 mph. Carbon fiber is light. Less mass means less resistance against uplift pressure. That combo is a real risk.
Track the car? Treat hood pins like a helmet — not optional, not up for debate.
Most sanctioning bodies — SCCA, NASA, NHRA — don’t publish a specific written rule requiring hood pins. But tech inspectors at the gate will flag an unrestrained aftermarket hood. The standard is clear, even without a rulebook entry spelling it out.
Run two layers of protection:
– Primary hood pins as your main retention system
– A secondary keeper looped around the OEM hook as a backup
– A visual check before every run — a closed quick-latch shows zero gap
That backup latch saved the Miata driver. Thirty seconds of your time before you pull onto the track. It’s worth it.
What Happens If You Skip Hood Pins on a Carbon Fiber Hood
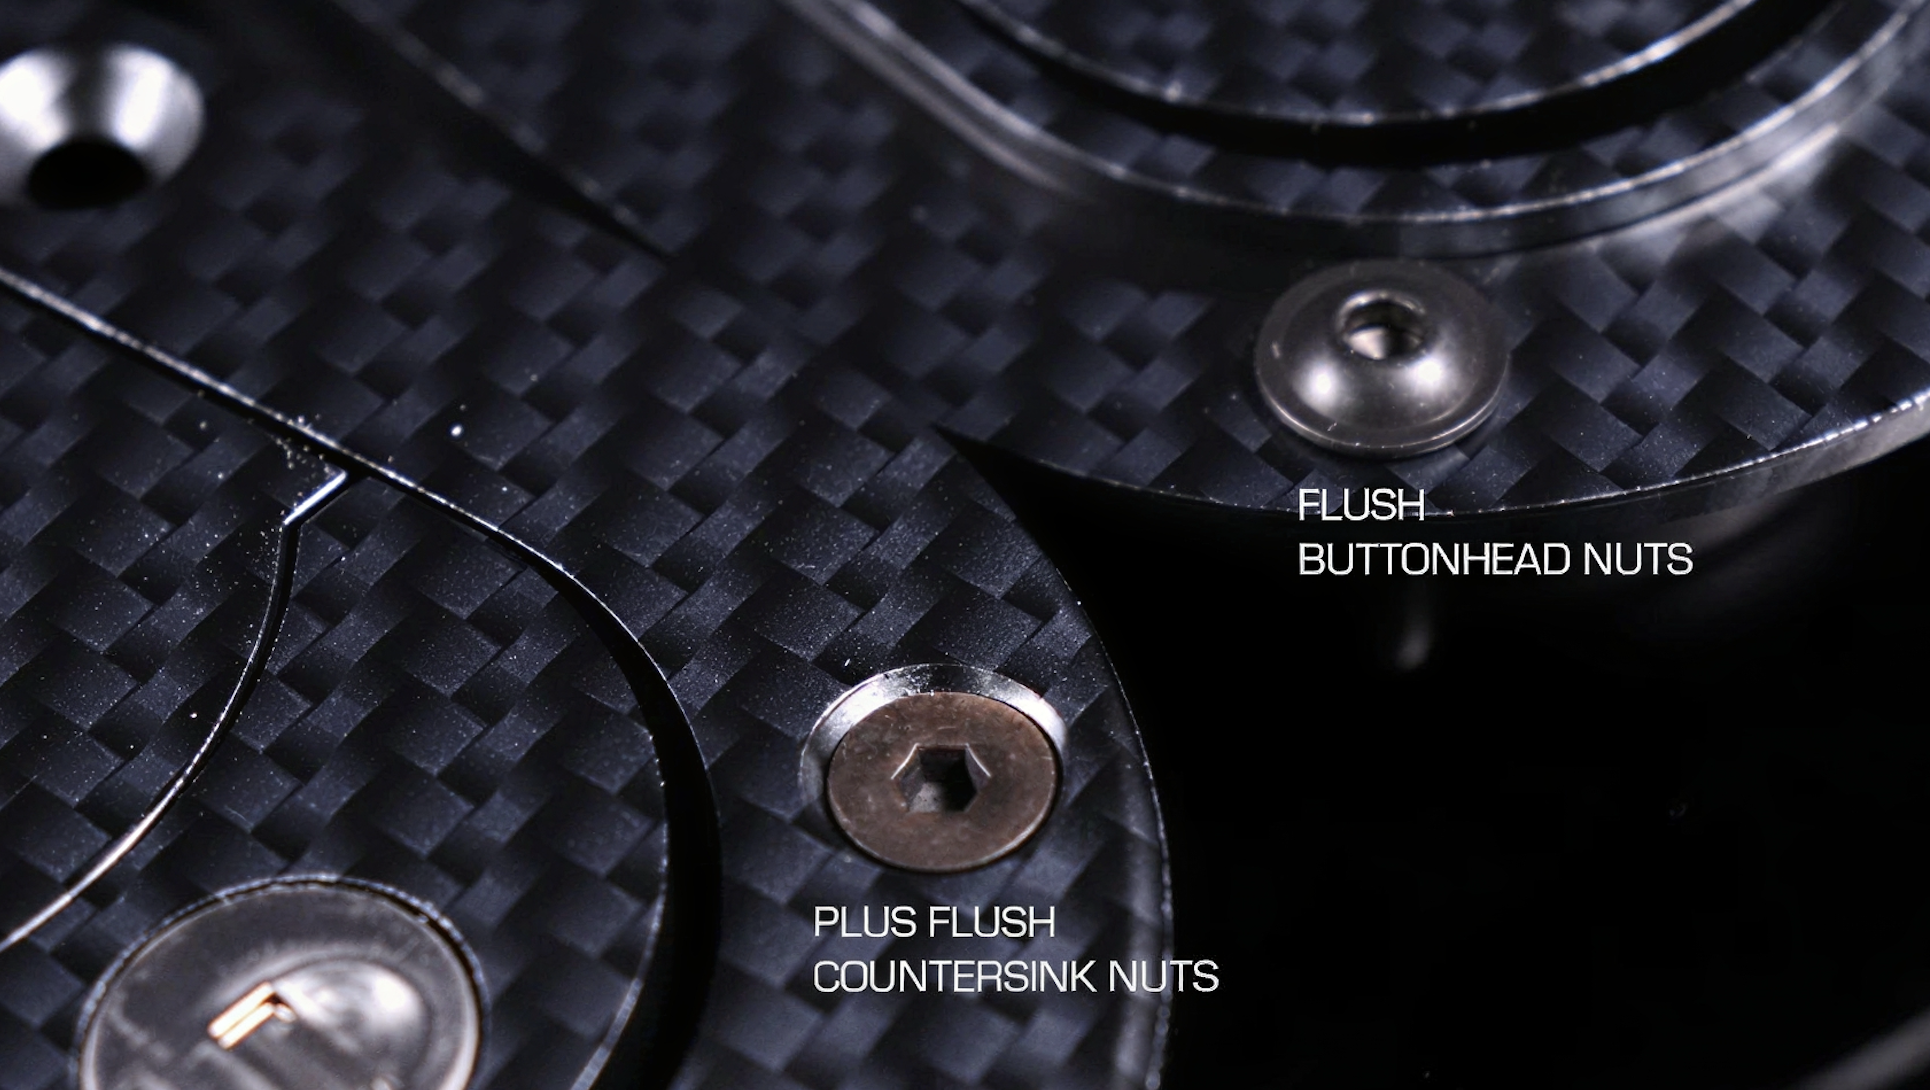
Skip hood pins and you don’t just add risk. You trigger a chain of failures. It happens fast, and the cost is ugly.
Here’s what goes wrong, step by step:
Step one: the hood starts moving. Carbon fiber is light — 10 to 25 lbs lighter than your OEM steel hood. That weight reduction is the whole point. It’s also the problem. Less mass means less resistance against upward air pressure. At freeway speeds, that pressure builds under the hood. Owners on RX7Club reported this with a Seibon TS carbon fiber hood — bowing, shaking, and lifting at speeds most people hit on a Tuesday commute. Not a track. Not a race. A regular freeway on-ramp.
Step two: your OEM latch becomes useless. Factory latches weren’t built for a hood this light. The geometry is wrong. The load rating is wrong. The latch grips the skeleton — but carbon fiber hoods have two layers: a top skin bonded to a bottom structure. Aerodynamic stress breaks down that bond over time. The skeleton stays latched. The skin pulls away. Nothing holds it back.
Step three: visibility drops to zero. A hood that flaps open blocks your entire forward view. At 70 mph, that’s not a close call. That’s a crash.
The legal risk is real. Multiple states classify an unsecured aftermarket carbon fiber hood as an equipment violation. The NASIOC forum puts it plainly: a stock latch alone on a CF hood is unsafe and illegal in most jurisdictions.
The fix is simple. Mount two pins at the front corners, through rubber bumpers to protect the carbon surface. Keep your OEM latch as a backup. To open the hood, pop the pins first, then release the latch. That three-step sequence — and the hardware behind it — is what keeps your hood on the car instead of on the road.
Choosing the Right Hood Pin Kit for Carbon Fiber Hoods
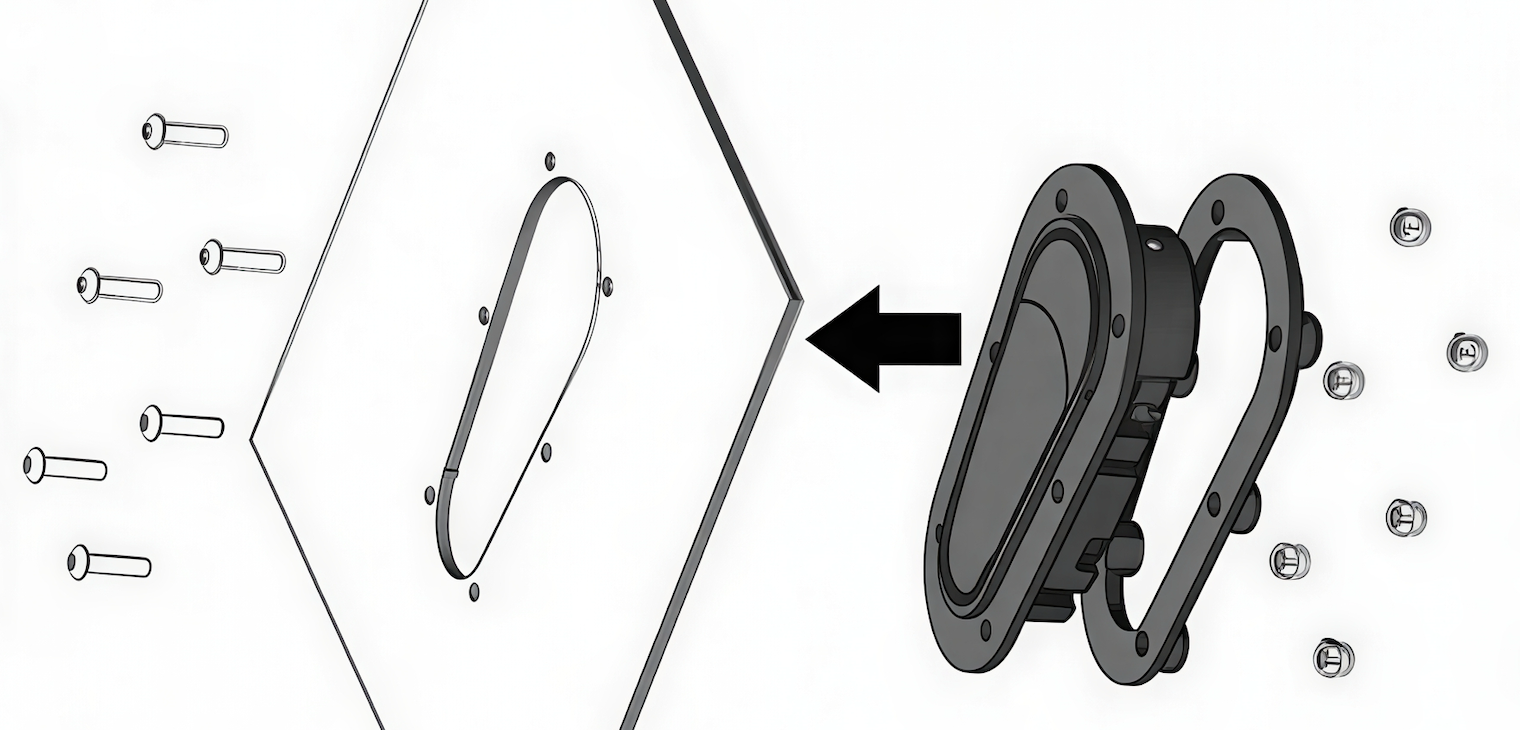
Not all hood pin kits work with carbon fiber. Use the wrong one and you’ll crack, pinch, or delaminate the hood you’re trying to protect.
Two systems dominate the market. Know which one fits your build.
Flush Mount vs. Traditional Exposed: The Core Decision
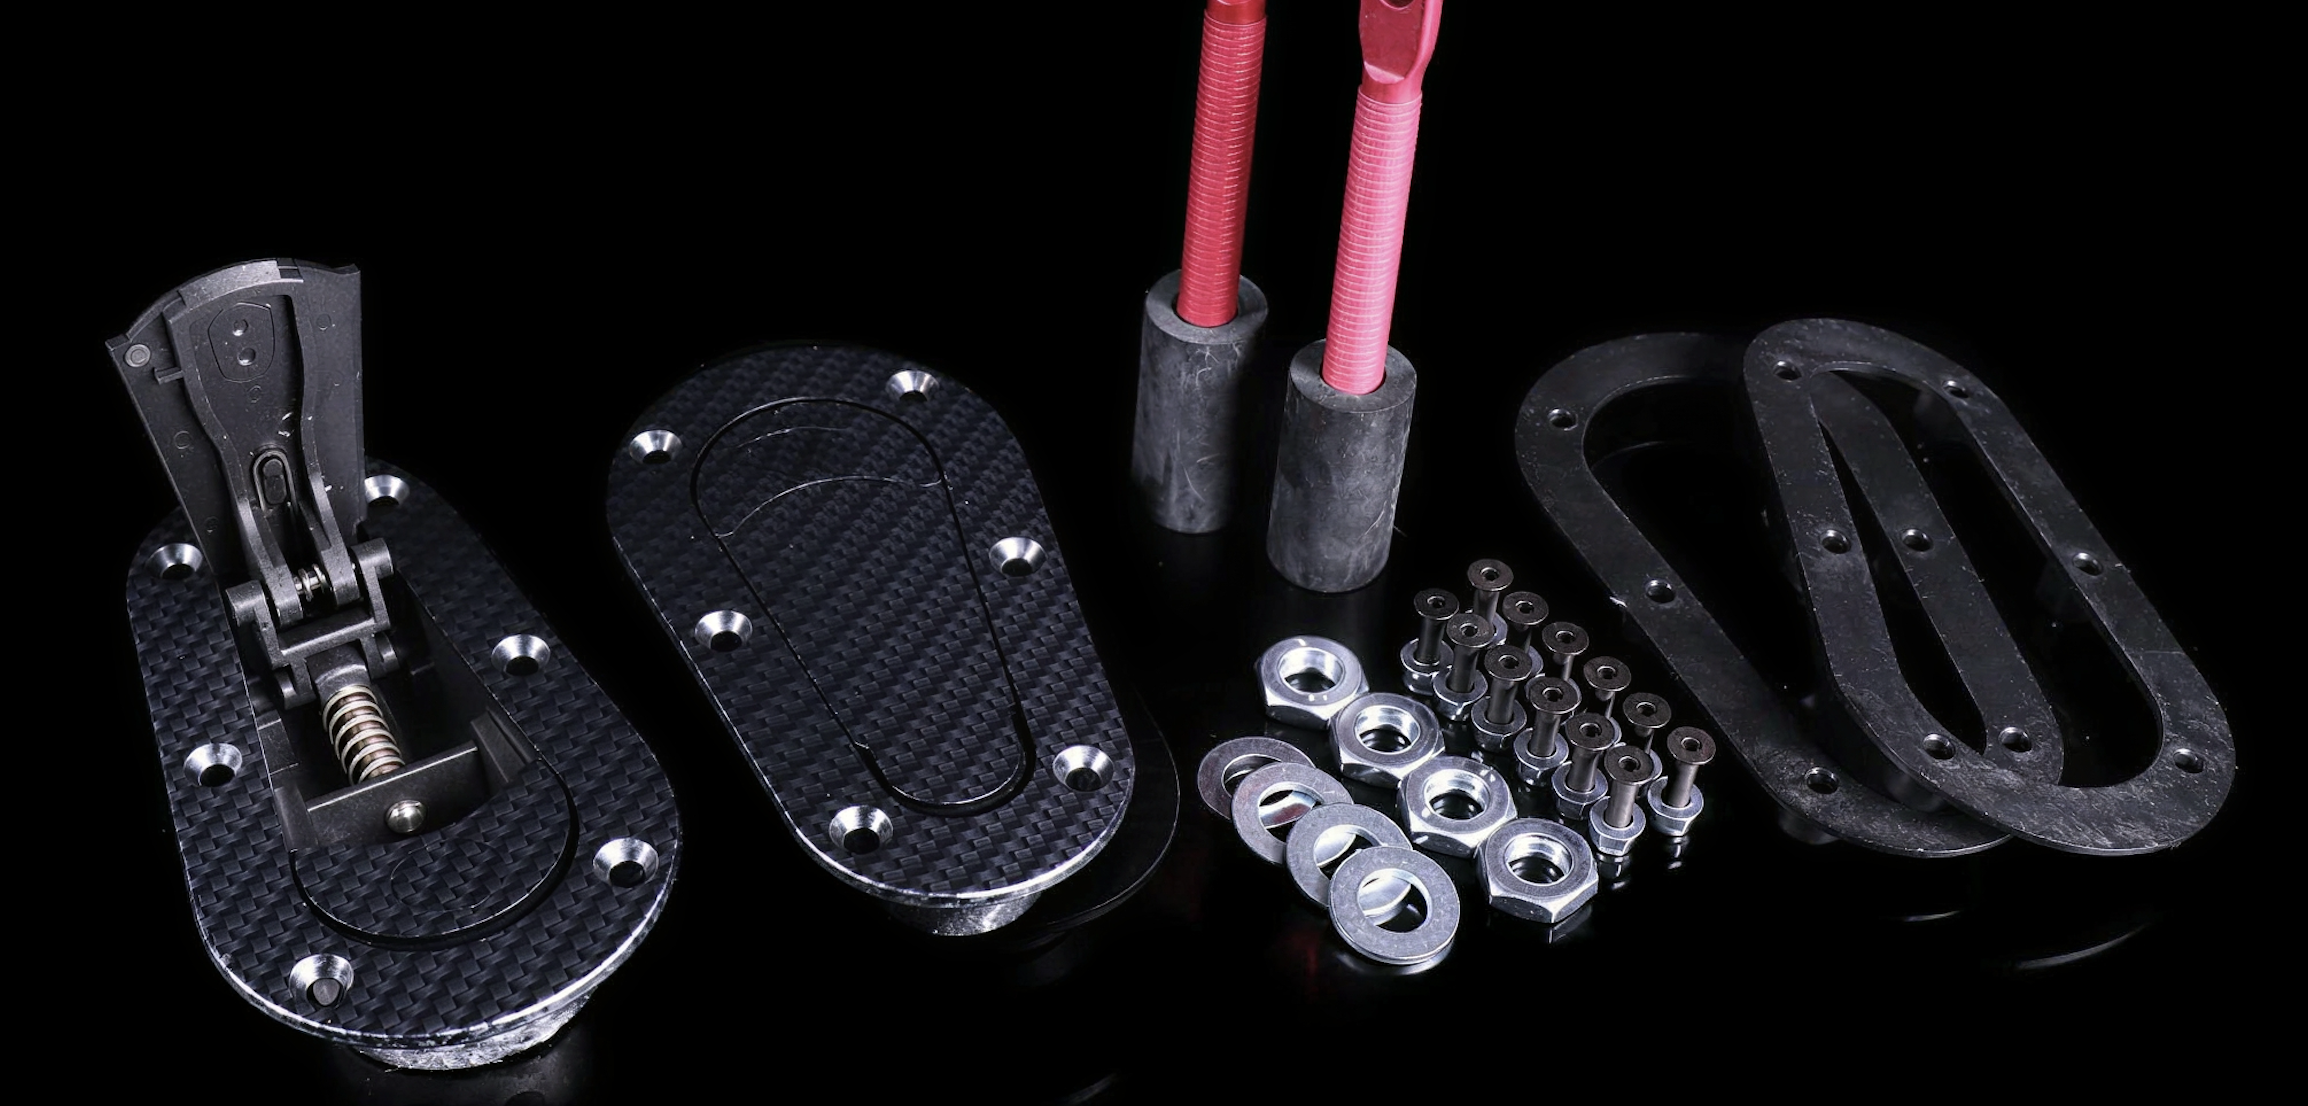
Flush mount kits (AeroCatch ACH125-3100 / 120-3100) sit underneath the panel. Nothing sticks out. No snag risk. The latch body is 50% glass-filled nylon. That material matters — it spreads clamping load across the carbon surface instead of pushing stress into one spot. Stress concentrated on thin carbon exterior layers causes rip-outs. Spread that load and you avoid them.
Each kit ships with two latches, stud strikes, rubber bump stops, a cut-out template, two key sets, and molded fixing plates. That template alone saves most builders from a bad misalignment that costs real money to fix.
Traditional exposed pins — like the Charge Speed universal carbon 2×2 twill at 2.5″ (63.5mm) diameter — sit above the hood surface. They work. They’re also cheaper. The tradeoff: harder to install, no template included, and a real snag risk on a track where marshals or recovery crews are moving fast.
The One Spec That Kills Most Installations
Maximum pin-to-latch angle: 5 degrees. Go past that and the latch won’t engage. This single spec causes more failed installs than anything else. Use a laser level or the tape-and-toothpaste method. Get your alignment right before you drill anything permanent.
Universal Kits vs. Vehicle-Specific Fitment
|
Universal Kit |
Vehicle-Specific |
|
|---|---|---|
|
Drilling required |
Yes — 2.5–3″ hole |
Sometimes pre-matched |
|
Misalignment risk |
Real — 2–3mm off means re-drill |
Lower |
|
Carbon reinforcement needed |
Always |
Built in most cases |
|
Best for |
Custom builds, budget flexibility |
Seibon / Anderson Composites hoods |
One rule holds no matter which kit you pick: never skip the backing plates. Skip them and you’re looking at a stress crack starting at your pin hole — and a $1,500 repair bill to go with it.
Tools You Need Before You Start (Carbon Fiber-Safe Checklist)
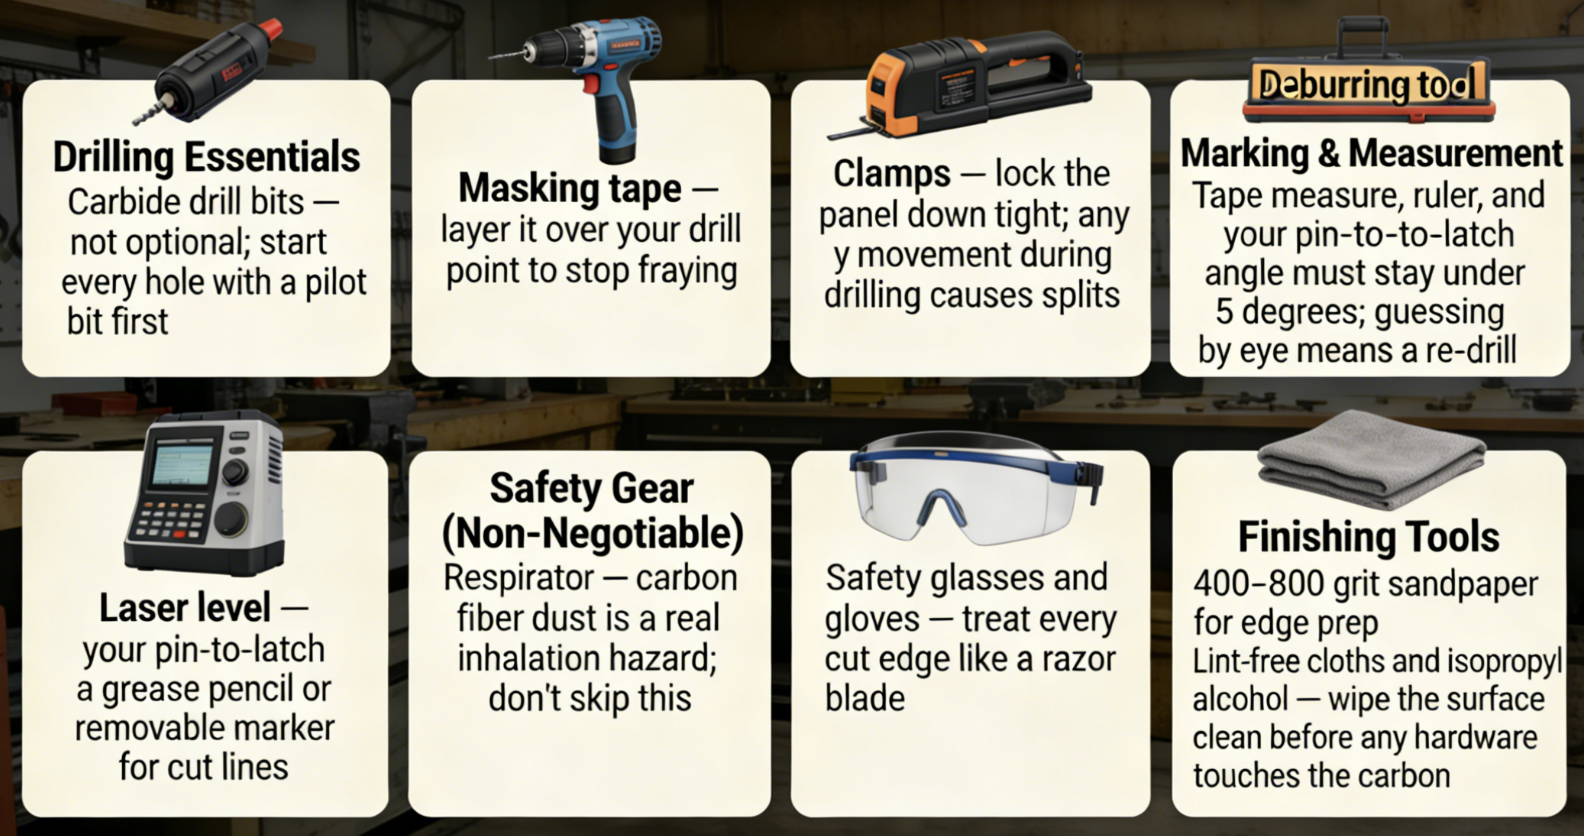
Wrong tools don’t just slow you down — they split fibers, crack your hood, and turn a $1,500 panel into scrap.
Gather everything on this list before you touch a drill. Carbon fiber has no tolerance for shortcuts.
Drilling Essentials
– Carbide drill bits — not optional; start every hole with a pilot bit first
– Masking tape — layer it over your drill point to stop fraying
– Clamps — lock the panel down tight; any movement during drilling causes splits
– Deburring tool — clean every edge right after the bit exits
Marking & Measurement
– Tape measure, ruler, and a grease pencil or removable marker for cut lines
– Laser level — your pin-to-latch angle must stay under 5 degrees; guessing by eye means a re-drill
Safety Gear (Non-Negotiable)
– Respirator — carbon fiber dust is a real inhalation hazard; don’t skip this
– Safety glasses and gloves — treat every cut edge like a razor blade
Finishing Tools
– 400–800 grit sandpaper for edge prep
– Lint-free cloths and isopropyl alcohol — wipe the surface clean before any hardware touches the carbon
Stage all of this before you start. Once you’re mid-drill, there’s no good time to stop and hunt for the deburring tool.
Step-by-Step: How to Install Hood Pins on a Carbon Fiber Hood
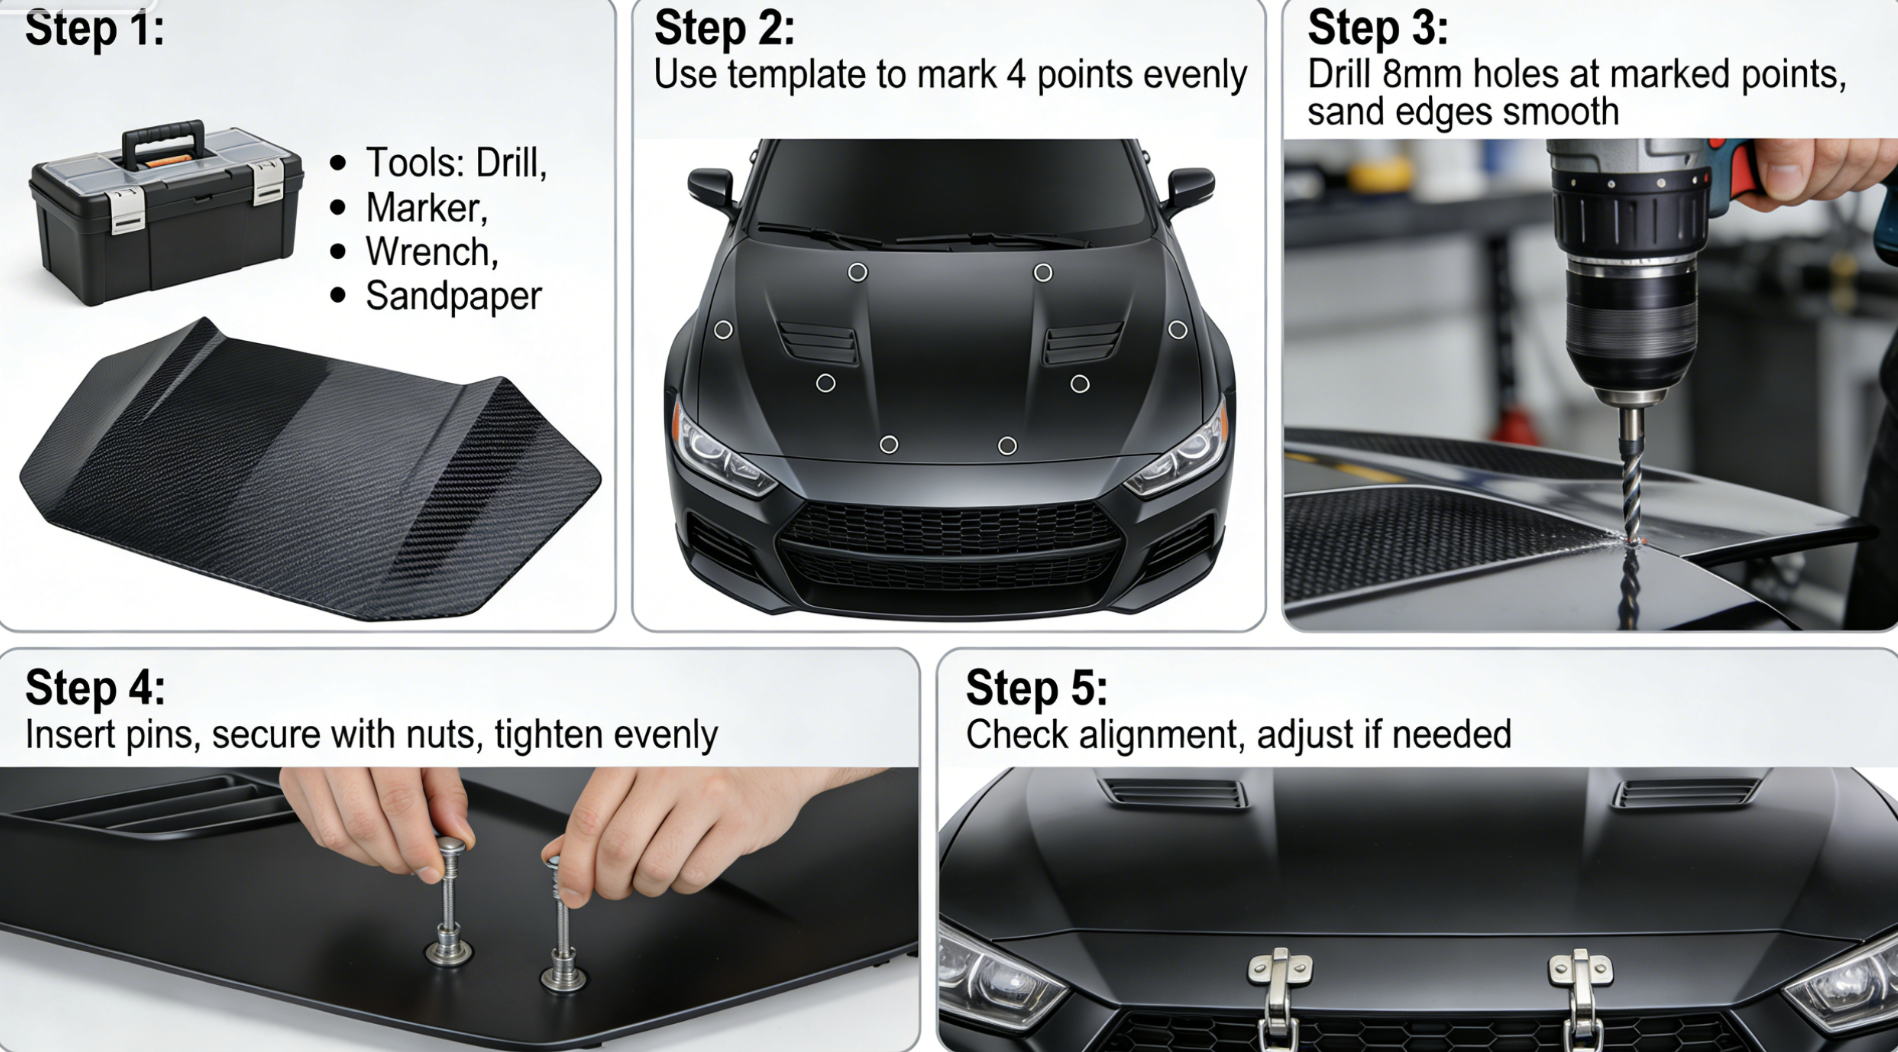
Carbon fiber doesn’t forgive bad cuts. One misaligned hole, one impatient drill stroke — you’ve just turned a $1,500 hood into an expensive lesson. The steps below prevent that. Every measurement gets confirmed before anything permanent happens.
Step 1: Install the Bulkhead Pins First
Mount the pin bases to the car’s body — not the hood. Lock these in place before the hood comes anywhere near a drill bit. Position matters. Use a laser level or tape crosshairs to confirm symmetry across both sides. For the second pin, use the headlight bolt as your alignment anchor. That keeps everything square.
Step 2: Transfer the Mark to the Hood
This is where most people skip a step and pay for it later.
Coat the tip of each mounted pin with grease, toothpaste, or thread sealant. Lower the hood onto the pins with steady, controlled hands. The coated tips leave an exact mark on the underside of the carbon surface. Lift the hood. That mark is your drill target — not a measurement, not an estimate. An exact transfer.
Lay painter’s tape over both marks before touching a drill. The tape does two things:
– Keeps the carbon surface scratch-free
– Gives your bit something to grip so it doesn’t skate across the panel
For the second pin, cut a cardboard template that follows the hood’s arc from side one. Flip it. Use it on side two. That’s how you keep both holes symmetrical — no guessing required.
Step 3: Drill the Hole — In Stages
Start with a 1/8″ pilot hole. No exceptions. Uni-bits crack carbon fiber — skip them entirely.
Step up drill bit sizes in 1/8″ increments until you reach 7/16″ to 5/8″, depending on your pin rod diameter. Let the weight of the drill do the work. Forcing it causes the bit to catch the fiber weave and rip.
Top layer: Trace the pin base shape and cut snug with a Dremel or Rotozip.
Bottom layer: Cut wider — about socket-sized — so you have hardware access underneath.
Run a deburring tool along every edge right after each step. Don’t wait.
Step 4: Sandwich the Hardware Through the Carbon
Top plate goes on the hood’s exterior surface. Bottom plate sits underneath the skeleton. Six Allen screws pass through the top and thread into the back plate. That sandwich construction stops delamination at the pin point.
Hand-tighten the nylon locking nuts first. Then snug them down with your Allen key. There’s no torque spec here — the test is simple. Try to twist the plate by hand. Zero movement means you’re good.
Step 5: Set Pin Height and Test the Closure
Thread the pin rod up or down until the hood sits flush. Mark the rod with thread sealant, close the hood, and check the transfer. The latch should catch with no gap and no upward pressure needed.
Height confirmed? Close the hood, press the latch, and pull upward with real force. Nothing should move. Any give at all — re-check your plate torque before the car rolls an inch.
Keep your OEM latch engaged as a backup. The pins are your primary system. The factory hook is your insurance.
One cut, one chance. Carbon fiber holes don’t shrink. Measure twice, transfer the mark, drill in stages — and you’ll only do this once.
Critical Mistakes That Crack Carbon Fiber Hoods (And How to Avoid Them)
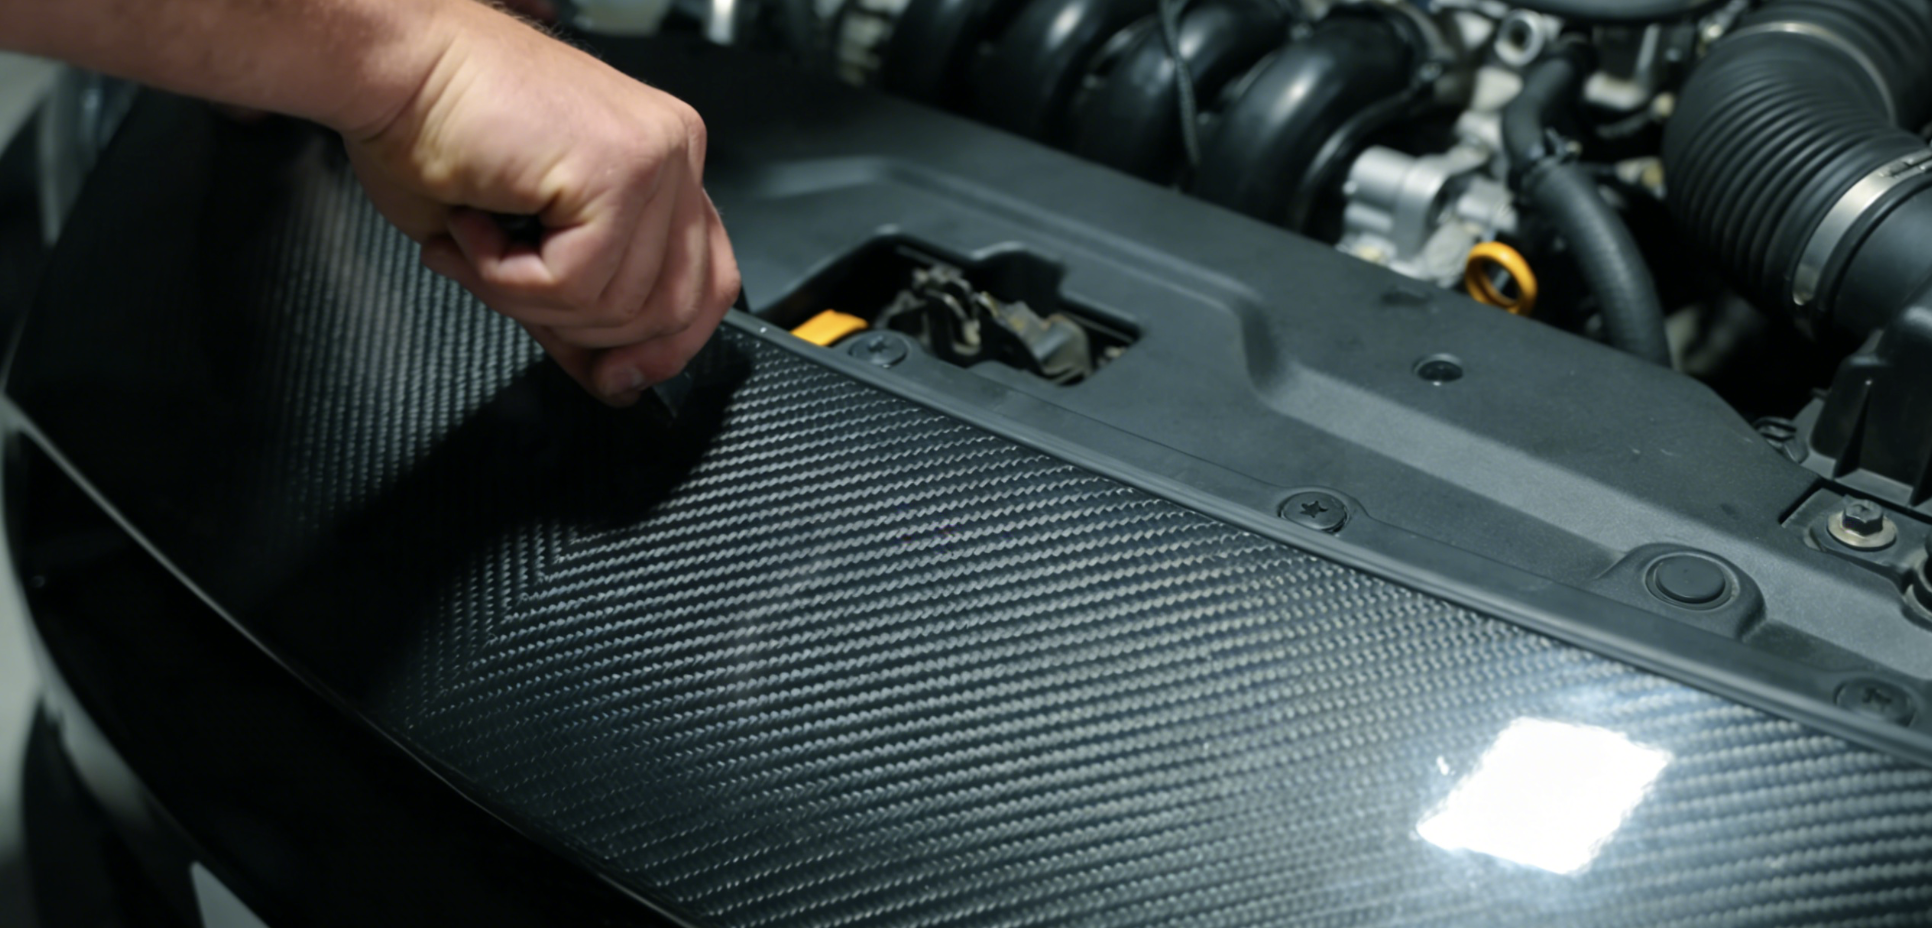
Most carbon fiber hood damage isn’t from accidents. It’s from the owner. The same three mistakes show up on every forum, every build thread, every “what happened to my hood?” post.
Here’s what’s cracking these hoods — and the exact fix for each one.
Mistake 1: Pushing Down on the Latch Point to Close the Hood
The front center section — right above the latch — is the weakest point on any carbon fiber hood. Owners press down there out of habit, the same way they did with their steel OEM hood. Carbon fiber doesn’t work like steel.
VIS and Fiber Images hoods on Honda and Maxima platforms both show the same crack pattern. Cracks start at the latch area and spread outward. The cause is always the same: repeated downward pressure at closing.
The fix: Don’t push the center down to force the latch. Close the hood from both front corners at the same time. Let the latch catch on its own. Your latch needs serious downward force to engage? That means the latch height is off. Adjust it now, before the carbon cracks.
Mistake 2: Letting the Hood Flip Up at Speed
Two-layer construction is where this failure starts. Most carbon fiber hoods have a carbon skin bonded over a fiberglass skeleton. The carbon skin handles looks. The fiberglass skeleton handles strength.
The hood flips up at highway speed — the fiberglass skeleton snaps. The carbon skin survives, but it’s now separated from everything holding it in place. That’s delamination. The hood looks fine on the outside. The structure underneath is gone. You can’t fix that in a driveway.
The fix: Engage your secondary latch before every drive. Your hood starts to bow or shake at speed? Back off the throttle. One Maxima owner learned this at highway speeds. The carbon skin came through. The fiberglass underneath didn’t.
Mistake 3: Ignoring Rock Chips and Flex Points
A small chip looks like a cosmetic issue. It isn’t. Rock chips expose raw carbon fibers and break the resin seal. Moisture gets into that gap, and the layers start fighting each other under flex. Spider cracks spread outward from there — on high-flex hoods like Top Secret builds, this happens fast. The skin runs thin across long unsupported spans, and there’s nothing to stop the spread.
The fix: Check the hood surface every few weeks. Any chip that exposes fiber needs to be sealed right away with clear coat or UV-stable resin. Keep flex low during removal and installation. Never prop the hood by grabbing a single edge and pushing it upward.
One rule covers all three mistakes: Carbon fiber is not steel. It doesn’t flex and bounce back. Each stress point either holds clean or cracks. Once it cracks, the repair cost almost always runs higher than what the hood is worth.
Hood Pins on Carbon Fiber: Street Legal & Regulation FAQ
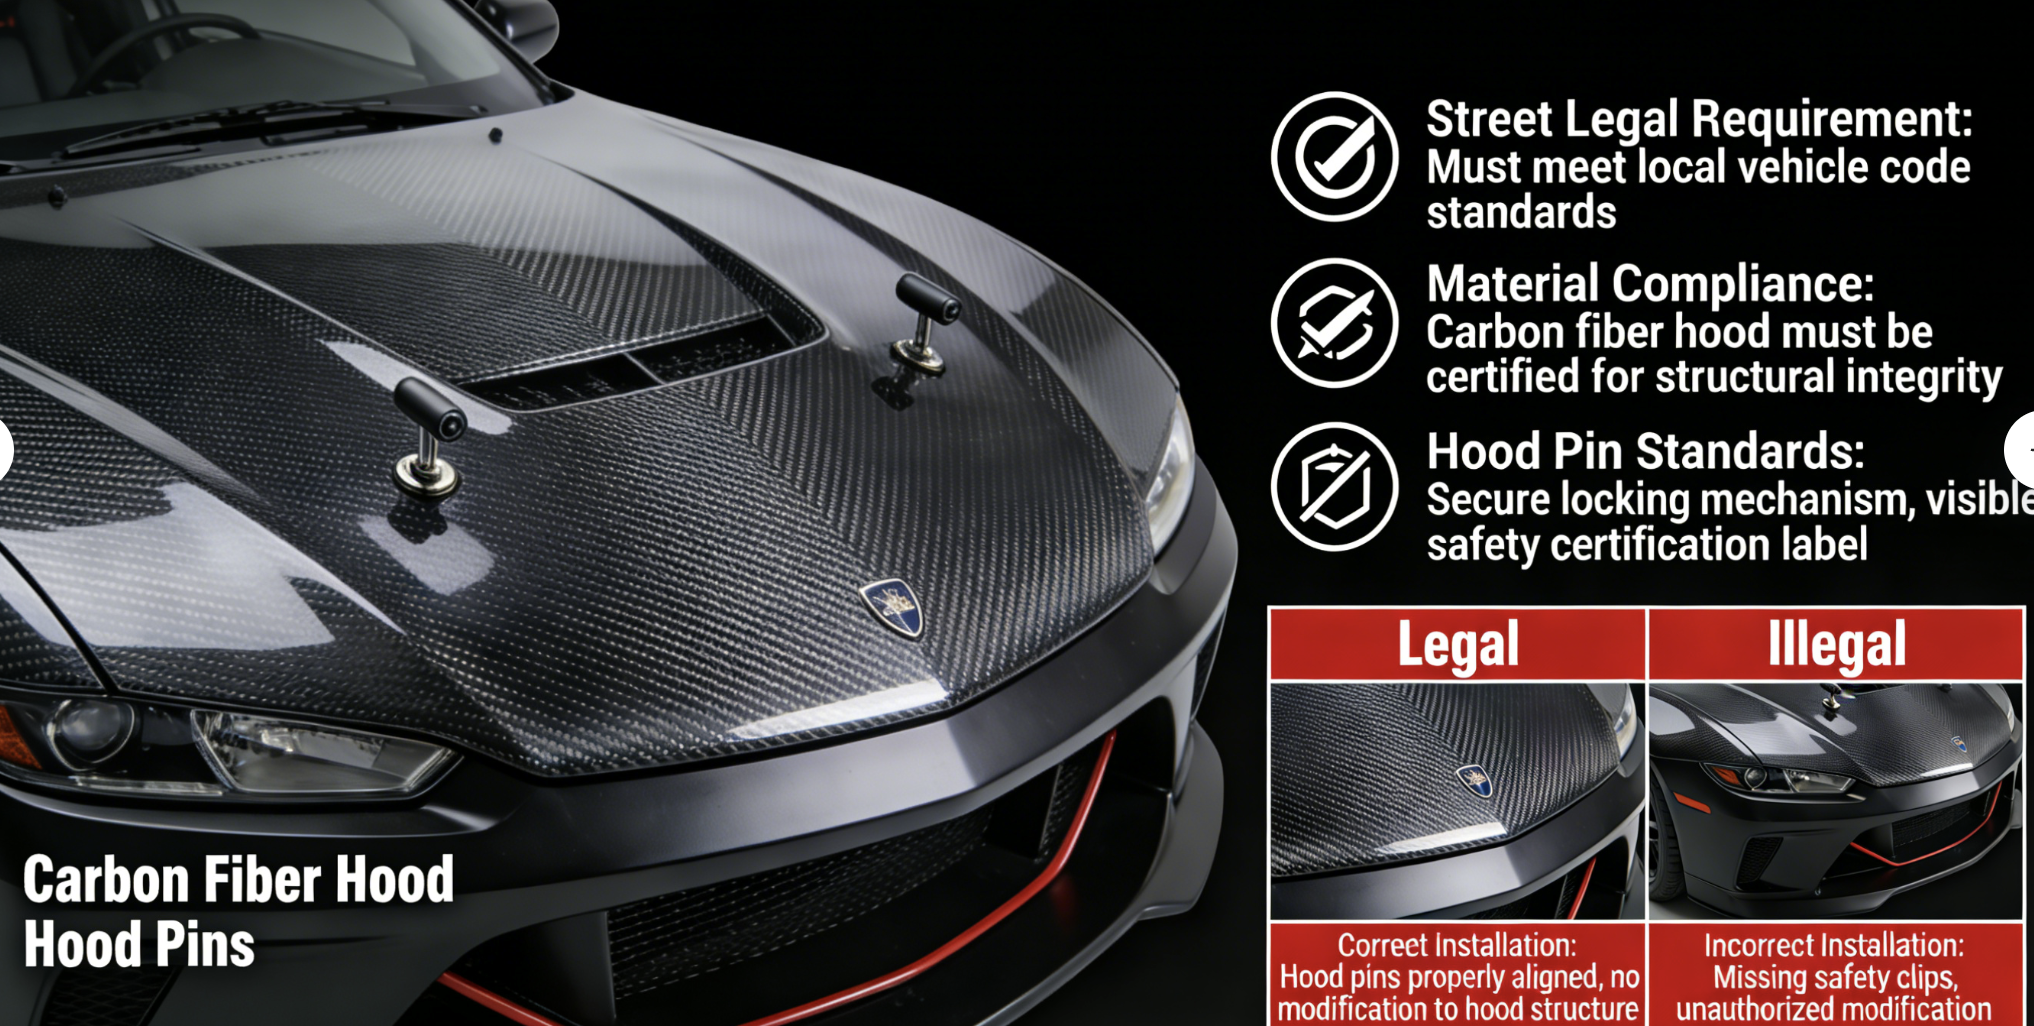
No federal law in the United States requires hood pins on a carbon fiber hood. That’s the straight answer. But “no federal mandate” doesn’t mean “no consequences.” The gap between those two things is where most people get caught out.
What varies by location:
-
California: No explicit hood pin rule, but aftermarket hoods must not impair safety. A 15-lb carbon fiber hood flying off on a highway is the kind of thing that fails that standard during a post-accident inspection.
-
Germany, Austria, Switzerland: TÜV certification is mandatory for CF components. No pins, no proof of secure fitment — you’re looking at potential fines or an unroadworthy classification.
-
UK: MOT inspection applies. Notify your insurer. Lightweight hoods without retention hardware are a known flagging point during inspections.
On insurance: Skip the pins and a detachment incident puts fault on you. VIS Racing’s own disclaimers label their hoods “off-road use only.” That language is there to shift liability onto the owner the moment something goes wrong on a public road.
Flush mount vs. exposed pins has legal weight too. Some regions flag protruding hardware under pedestrian safety rules. Flush mount systems avoid that problem altogether.
Forum records going back to 2002 show zero tickets issued for a carbon fiber hood alone. But those same threads all recommend pins — because the legal risk isn’t the ticket. It’s the accident report that comes after.
Frequently Asked Questions About Carbon Fiber Hood Pins
The same questions come up every time someone installs a carbon fiber hood. Here are straight answers.
Will hood pins damage my carbon fiber hood?
Not if you install them right. Use the toothpaste transfer method to mark your drill points. Standard mount hole is 1.25 inches (32mm). Overtightening causes cracks. So does misalignment. Good technique stops both problems before they start.
Can I install hood pins without drilling?
Yes — sometimes. Many builds reuse existing OEM latch openings. Remove the 12mm bolts, pull out the push pins, then drop your new pins straight through. No new holes needed. Fitment doesn’t always allow that, though. Some setups require drilling — there’s no way around it. Not sure which applies to your build? Have a professional handle it.
How many pins do I need?
Two. Every kit ships as a pair. Combined holding force: 1,000 lbs — 500 lbs per latch. That covers any street or track application you’ll run into.
Do hood pins work with a functional scoop?
Yes. Low-profile pin designs sit just 0.875 inches (22mm) tall. Keep a minimum mounting distance of 1.125 inches (28.5mm) from the pin center. Also, stay within the 18-degree max angle. Do both, and clearance issues go away.
Shop Hood Pin Kits Compatible with Carbon Fiber Hoods
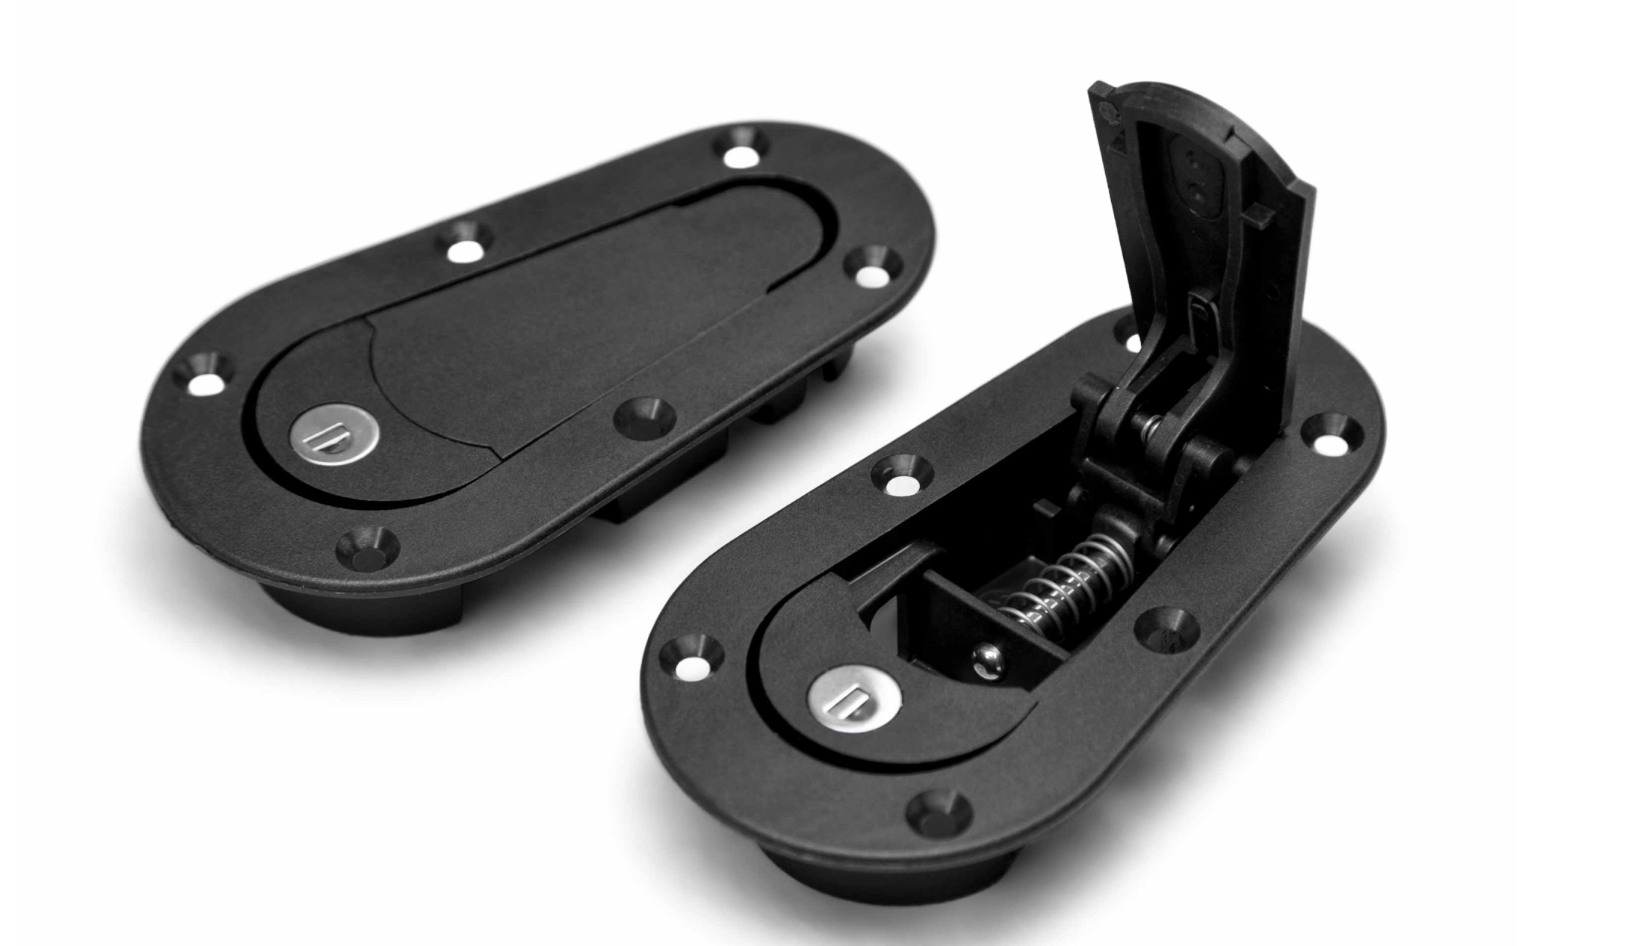
Two kits dominate this space. Pick the wrong one and you’ll be re-drilling.
Quik-Latch QL-38 — 500 lbs of static holding force per latch, 3.2 oz total weight, 0.875″ profile height. Built from aluminum and stainless steel. It handles up to 18 degrees of mounting angle — that’s a real advantage on hoods with curved front sections. You’ll need a 1.25″ mounting hole to fit it.
AeroCatch Flush Locking — sits beneath the panel with zero visible profile. The latch body is composite. It comes with a cut-out template, rubber bump stops, and keys. Angle tolerance is tight at 5 degrees, so measure before you drill.
|
Quik-Latch QL-38 |
AeroCatch |
|
|---|---|---|
|
Holding Force |
500 lbs/latch |
Not rated |
|
Profile |
Low-profile, push button |
Flush mount |
|
Angle Tolerance |
18° |
5° |
|
Template Included |
No |
Yes |
Street build with a clean look? Go with AeroCatch. Track car where fast hood access is the priority? Quik-Latch is the pick. Both use corrosion-resistant materials. Neither one will react with carbon fiber surfaces over time.
Conclusion
Your carbon fiber hood is one of the most visible — and most vulnerable — upgrades on your build. Track days on weekends or just chasing that clean motorsport look on the street — the answer to “do I need hood pins for a carbon fiber hood” lands in the same place: yes, and sooner than you’d expect.
The stakes are simple. A $1,200 hood flies open at 70 mph and doesn’t just destroy itself. It takes your windshield, your visibility, and your life with it. Hood pins are a $30–$80 insurance policy against that outcome.
Do it right — slow drill speed, sealed edges, proper backing plates — and your carbon fiber stays in perfect shape. Rush the install, and you’ll pay for it through delamination.
Contact HyperX Carbon – Your Trusted Chinese Carbon Fiber Partner
Ready to source high-performance carbon fiber materials or custom forged carbon fiber parts from China?
HyperX Carbon is a leading manufacturer with 20+ years of expertise, specializing in aerospace-grade forged carbon fiber, prepreg, carbon fiber tube, carbon fiber sheet, and lightweight carbon fiber automotive parts/carbon fiber drone components/carbon fiber medical components. We offer:
-
Stable supply chain with premium raw materials (Toray, Mitsubishi, Hengshen)
-
AS9100D certified production for aerospace & UAV applications
-
Rapid prototyping (5-8 weeks) and monthly capacity exceeding 180,000 parts
-
Competitive pricing with 15-18% cost savings on forged carbon solutions
-
Full customization: from T700/T1100G to ultra-high modulus grades
Whether you’re an eVTOL developer, automotive OEM, drone manufacturer, or medical device engineer, HyperX delivers consistent quality, batch-to-batch reliability, and reliable delivery.
Get in touch today for a free consultation, custom quote, or material sample.
📧 Email: [email protected]
🌐 Website: https://www.hyperxcarbon.com/
📞 Phone/WhatsApp: +86 15623270276 (English support available)
Let’s build your next lightweight innovation together – contact HyperX Carbon now and stay ahead in the low-altitude and advanced composites market.