Swapping your factory hood for a carbon fiber upgrade seems simple — until you’re standing in the driveway with a $1,200 panel, a set of borrowed wrenches, and one big question: is this thing going to stay closed at 80 mph? That hesitation makes sense.
A bolt-on carbon fiber hood installation is more than just unbolting the old and bolting on the new. Alignment gaps, heat damage, and the hood pins debate are all real factors. Each one can make or break the final result.
This guide covers the full process:
-
Pulling your OEM hood without scratching a fender
-
Dialing in fitment for clean, even gaps
-
Installing a carbon fiber hood heat shield
-
Deciding whether hood pins belong on your build
What You Need Before Starting: Tools & Materials Checklist

Gather everything before the hood comes off. The panel will be unbolted and resting against your bumper — that’s not the time to go searching for a 10mm socket.
Basic hand tools:
– 10mm and 12mm sockets with a ratchet — these cover 90% of hood hinge bolts across most platforms
– Flathead and Phillips screwdrivers — for trim clips, hood liner fasteners, and latch adjustment
– Torque wrench — hinge bolts require consistent torque. Too tight, and you’ll crack the carbon fiber
– Rubber mallet + wood block — nudge hinges during gap adjustment without scratching the panel
Materials you’ll need:
– Painter’s tape — mark gap measurements before you pull the OEM hood
– Blue threadlocker (Loctite 243) — put this on hinge bolts for lightweight panels that vibrate at speed
– Carbon fiber hood heat shield — a must if your engine bay runs hot near the underside
– Hood pin kit — skip it on street cars, but get it on track builds
Most of this is a one-person job. The lift-and-position stage is not. Get a second set of hands for that part. A $1,200 panel hitting concrete is not something you want to explain.
How to Remove Your OEM Hood Without Damaging Hinges

The OEM hood comes off in a specific order. Skip that order, and you’re chasing paint scratches for the rest of the afternoon.
Before touching a single bolt, prop the hood all the way open and lay rags under every support point. Tape your fender edges with painter’s tape if the hood sits close. That’s three minutes of prep. It keeps you off the hook for a repair bill.
The removal sequence that works (CK5 method):
-
Secure the prop rod — the hood stays open, no hands needed
-
Loosen the front bolts on both hinges first
-
Back off the rear bolt on one side and rest that edge on lumber blocks on the cowl
-
Pull the last bolt on that side and let the hood slide back — slow and controlled
-
Repeat on the opposite side
-
Walk the hood forward off the 2x4s — do not lift and carry it alone
That last point is real. A carbon fiber hood sits in the 15–25 lb range — fine solo, until it shifts. One corner drop on a fender rail sends you straight to repaint. Grab a second person.
What transfers to the new hood:
-
OEM hinges are reusable — pull them off with the springs still loaded
-
Hood bolts and nuts carry straight over
-
Some bolt-on carbon fiber hoods come with self-tapping screws — check your fitment kit first. Don’t assume the OEM hardware matches
Store the hinge bolts in a labeled bag. You’ll torque them back to manufacturer spec at reinstall — don’t lose track of them.
Bolt-On Installation: Step-by-Step Carbon Fiber Hood Fitment
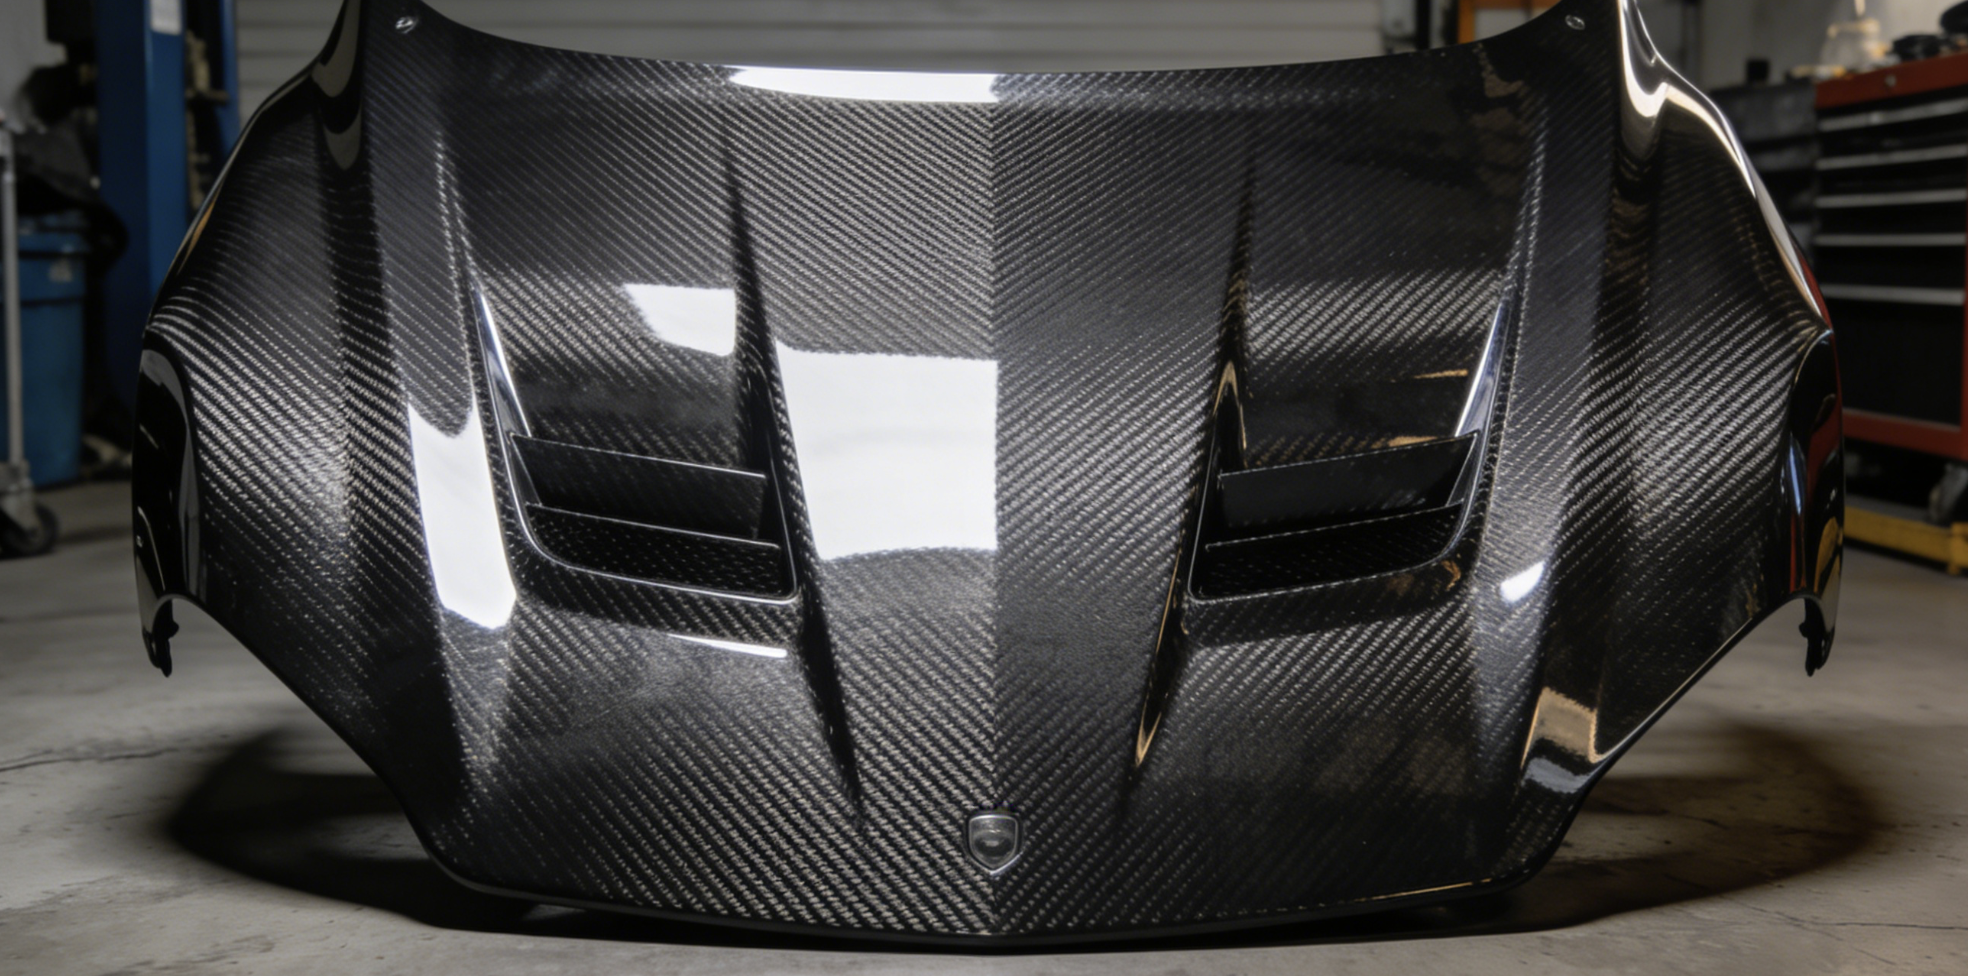
Four bolts per side. That’s the full mechanical commitment of a bolt-on carbon fiber hood swap — as long as you follow the right sequence.
The steps below match the hinge pattern on the 2015+ F30, FK8 Civic Type R, and S550 Mustang. All three share the same four-nut hinge layout with 500–550mm OEM hinge spacing. Got a 2026 model with the same spec? This process works the same way. Check your specs before ordering.
The Six-Step Fitment Sequence
Step 1: Position and hand-tighten first
Set the carbon fiber hood onto the hinges. Thread all four 13mm hinge nuts by hand — two per side, upper and lower. Don’t torque anything yet. This gives you a full range of movement within the hinge slots. You get up to 0.5 inches of adjustment travel in any direction at this stage.
Step 2: Check your gaps before committing
Walk the perimeter. You’re targeting 3–5mm of even clearance along both fender edges and the front lip. Asymmetric gaps — one side sitting higher, or the driver’s corner riding proud — are normal here. That’s exactly what the adjustment slots handle.
Step 3: Dial in the gaps — one side at a time
Loosen the fender bolts (10–12mm, one front and one rear per side). Use a wood block and rubber mallet to nudge the hood side to side. Then re-snug. Work one side at a time — loosen, shift, check, repeat. Trying to fix both sides at once turns a 10-minute job into a 45-minute loop.
Step 4: Torque in two stages
Gaps look even? Torque the hinge nuts in two passes: 10–15 Nm first, then 20–25 Nm final. Carbon fiber cracks past 30 Nm — that’s the hard limit. Use a right-angle adapter on the lower nuts where space is tight.
Step 5: Reinstall the latch
Bolt the stock latch back on using its 10–12mm bolts — four to six total, depending on your platform. Check that the arrow faces forward. Make sure the push-release button moves smooth before final torque. Close the hood three times as a test. Hard catch or off-center? Back the latch off and re-center it.
Step 6: Reconnect struts and tune bump stops
Clip the strut clips back on — clip only, no full detach needed. Then adjust the bump stops: out two to three turns raises the leading edge, in lowers it. Target a ±2mm flush tolerance against the fender surface. That’s the difference between a clean install and one that looks rushed.
One step most guides miss: After final torque, check washer hose clearance. On FK8 and GTI platforms, the hose can pinch against the hood edge on close — especially if the strut reconnect shifted the routing. A 30-second visual check saves a cracked hose.
Carbon Fiber Hood Alignment Tips: Closing Gaps and Preventing Paint Rub

Even gaps don’t happen by accident. At 16.3 lbs — about 20 lbs lighter than your OEM panel — a carbon fiber hood behaves differently on its hinges. That weight drop shows up straight away in how the gaps sit. Here’s how to dial them in without scratching paint.
Three Axes, Three Controls
Each gap problem has a specific bolt that owns it. Work them in this order:
-
Left-right (lateral): Loosen the front three fender bolts. Leave the rear bolt tight — it acts as a pivot point. Pull the fender edge out to close a tight gap, or push it in to open a wide one. The oval holes give you 5–10mm of lateral travel — more than enough for most installs.
-
Front-rear (longitudinal): Loosen the 13mm hood nuts (four per side). Slide the hood forward or back along the hinge slots. Final torque lands at 18.5 Nm — no higher.
-
Height: Phillips screw on top, lock nut underneath. Turn the bump stops out to raise the leading edge. Turn them in to drop it. Match the flush level to the fender surface.
Once lateral and longitudinal gaps are set, back off the 3–4 latch bolts and re-center the latch. This levels the hood without adding new movement.
The Wood Block Method for Micro-Adjustments
Place a 1–2″ wood block on the hood edge. Tap with a rubber mallet — 1–2mm per tap, nothing more. Loosen the bolts first. Tap, then hand-tighten. Close the hood 5–10 times to let it settle into its real-world position. Put tape reference lines on both the hood and hinge. That way you track actual movement instead of guessing.
Acceptance Standards Before You Call It Done
-
Gap uniformity: 3–5mm even across all edges, less than 1mm variance side to side
-
Flush level: ±1mm against both fenders, no paint contact after 10+ test closes
-
Operation: latches without force, no rattles, corners touch the bump stops with no drag
If the hood sits high or rubs on close, the latch is the usual suspect — not the hinges. Pull it, re-fit the gaps without it, then reinstall.
Carbon Fiber Hood Heat Shield Installation: Protecting Against Heat Damage

Steel shrugs off engine heat. Carbon fiber doesn’t.
No heat shield means the underside of your carbon fiber hood soaks up radiant heat. The clear coat bubbles, yellows, and hazes over time. That’s not just a cosmetic issue — it’s structural damage building up slowly. The data is clear: a Lava Shield installed on the hood dropped surface temperature from 121°F to 101.9°F — a 19.1°F reduction. That difference decides whether your hood still looks sharp at 50,000 miles or not.
Where to Apply Heat Shield Tape (Priority Order)
Not every surface needs equal coverage. Work through these zones in order:
-
Hood underside — the highest heat exposure zone; use 3+ rolls of tape here
-
Hood vent openings — tape the inside of every vent, top and bottom
-
Front edge — maximum heat concentration point; don’t skip this
-
Intake pipe — run tape along the full length
-
Coolant hoses — cover any exposed sections running near the hood line
Pull off the adhesive backing and press the tape hard into the hood’s skeleton structure. Every gap lets heat through. Close them all.
FRP Skeleton vs. Carbon Fiber Skeleton
This detail matters more than most guides admit. OEM carbon fiber hoods use a carbon fiber substructure underneath — better heat tolerance is built right in. Most aftermarket hoods use an FRP (fiberglass reinforced plastic) skeleton instead. FRP runs hotter and breaks down faster under steady heat exposure. Got an aftermarket hood? Go heavier on coverage — focus on the vents and front edge first.
Rain Guard Installation
Most aftermarket carbon fiber hoods come with a rain guard included. Set it over the hood vent opening, then fasten it with the included Phillips head screws. It blocks water from entering the engine bay and still lets air flow through. Don’t skip it assuming the vents are just for looks.
One finishing detail: run a thin line of super glue along any cut edges before the heat shield goes on. It stops fraying before it starts.
Do You Need Hood Pins for a Carbon Fiber Hood? (Safety Analysis)

The short answer: it depends on how fast you drive.
A carbon fiber hood weighs 10–15 lbs — about one-third to one-fifth of a steel panel. That weight gap is why your stock latch behaves differently at speed. Above 100 mph, aerodynamic lift builds fast. OEM latches have failed on carbon and fiberglass hoods because of it. This isn’t theory. NASIOC forum threads document real incidents — hoods detaching at highway speeds. One Subaru case at 120 mph ended in a crash. The hood flew up, blocked the windshield, and the driver had zero warning.
Street vs. Track: Where the Risk Lands
|
Scenario |
No Pins |
With Pins |
|---|---|---|
|
Street (<80 mph) |
Medium risk (10–20% in wind gusts) |
<1% |
|
Track (>100 mph) |
50%+ reported failure rate |
Very low |
For street driving, use hood pins above 70 mph sustained. At track speeds, they’re non-negotiable. Most US states require them for carbon or fiberglass hoods during tech inspection — no pins, no pass.
Which Hood Pin System to Choose
-
Traditional pull-pin (Aeroflow, ~$20–50/pair): Locks solid. Takes 2–5 seconds to release. Good as a backup option, not ideal for frequent use.
-
Aerocatch flip-up (~$150–300/pair): Opens in one second. Sits flush with the hood. Holds over 500 lbs. Best pick for street use — fast to open, clean finish, no fuss.
Installation Basics
-
Drill 1-inch holes 6–8 inches from the hood edge
-
Mount the base to the chassis with 4–6 inch spacing
-
Torque stainless pins to 10–15 Nm
-
Test at 60+ mph before calling the install done
How to Install Hood Pins on a Carbon Fiber Hood: Precision Drilling Guide

Drilling into a $1,200 carbon fiber panel makes most people stop and rethink the whole project. Get it right and you’ll never worry about it again. Rush the pilot hole and you’ll crack the panel. No touch-up paint will fix that.
Here’s the process that works.
Bracket Placement First
Position the lower bracket against a structural reinforcement point on the underside. Stay away from the edge and avoid thin material. You need 0.5 inches of pin travel clearance below the bracket. The upper bracket sits flush against the hood’s surface curve. Align a hex bolt edge to the nearest ridge, then tap a nail or screw to leave a 1–2mm indent mark. That mark is your drill target.
The Symmetric Drilling Sequence
Symmetry is not optional here. A misaligned hood pin is worse than no pin at all. It puts uneven stress on the panel every time you close the hood.
-
Mark both sides at the same time using the support bracket as a reference template
-
Start with a 1/16″ pilot hole — no larger. Carbon fiber splinters without this step
-
Move up in stages: small bit → unibit to 7/32″ → 1.25″ hole saw for the final pass
-
Match your drill angle to the hood’s surface curve — up to ~15 degrees off vertical, depending on your hood profile
-
Use a laser level or a braced 2×4 to keep the drill path consistent on both sides
Put anti-seize compound on the pin tip. Close the hood with light pressure and let the pin press a transfer mark onto the hood surface. That mark shows where the pin contacts at real closing depth. It differs from where the pin sits with the hood propped open — that position runs high and leads to misaligned holes.
Final Fitment and Function Check
Thread blue Loctite under the nut before final torque. The pin strikes the inner lip on close? Shorten it by 1 inch and retest.
Run through this checklist before driving:
-
Pin travel: Slides the full length without resistance, engages to ~0.5″ depth
-
Latch engagement: Hood closes flush, pin seats fully in the catch — adjust height or angle if it doesn’t seat right
-
Seal the edges: Run a thin bead of RTV sealant around each hole perimeter to block water intrusion
-
High-speed pull test: Hood latched and pinned — pull upward at the front corners to simulate load. No movement means you’re done
One detail most people skip: wear a dust mask during drilling. Carbon fiber dust is too fine to notice as you breathe it in. Over repeated exposures, it causes real respiratory damage.
Common Carbon Fiber Hood Problems and How to Fix Them

Most carbon fiber hood issues trace back to one of five root causes. Pinpoint which one you’re dealing with and you cut troubleshooting time in half.
Uneven Gaps
Gaps that look fine on one side and wrong on the other? You tightened the hinges before the hood settled into its natural position. The fix is a full reset — not another round with a rubber mallet.
Three-step reset:
1. Loosen all hinges completely and back out the bump stops
2. Center the hood by hand, then adjust each hinge in equal steps toward a 1–2mm gap target
3. Tighten in turns — one side, then the other — and recheck after each pass
A VIS carbon fiber hood on a Del Sol had persistent gaps even against a straight radiator support. Three fenders were tried. None of them were the problem. The real culprit was the hinges never getting a full release during any of the previous adjustment attempts.
Hood Won’t Latch
Check the latch direction first. A reversed install is more common than it should be. From there, adjust striker height 2–3mm up or down until engagement feels solid. Spring tension below 50% of original? Replace the spring. Adjusting a weak spring only pushes the same problem down the road. Also check for the prop rod or AC brackets fouling the closure path.
Warping and Deformation
Two different causes, two different fixes:
|
Type |
Cause |
Fix |
|---|---|---|
|
Install stress |
Hinge studs 2x longer than the CF panel needs |
Trim studs 2–3 threads; cut clearance channels for prop rod and strut brace |
|
Heat/UV damage |
South Florida-level sun degrades coating in 2–3 years |
Assess delamination; replace if more than 20% of the underside is compromised |
Trimming the studs alone can close gaps from 5mm+ down to 1–2mm. That one step fixes more than most people expect.
Rattling at Speed
Isolate the source before touching any adjustments. Lift the hood 5cm, shake it, and tape off components one at a time until the rattle stops. The usual suspects:
-
Loose hood pins — torque to 10–15 Nm
-
Prop rod not locked in place — mark the contact point, cut 1–2mm clearance channels
-
Incomplete latch engagement — adjust the striker until play is under 1mm
Durability Reality Check
A quality carbon fiber hood takes more abuse than most people expect — hammer drops, minor flex, road vibration. It holds up well through all of that. What it can’t handle is sustained UV exposure. In high-sun climates, coating failure shows up within 2–3 years on unprotected panels. That’s not a long timeline.
Heat shield coverage on the underside and a UV-resistant clear coat on top are not optional. Skip them and the hood degrades fast. Keep them in place and the hood still looks right at 50,000 miles. That’s the difference.
Carbon Fiber Hood Installation FAQ
How long does a carbon fiber hood installation take?
Budget 2–4 hours with a helper. First install? Add extra time — alignment alone can eat an hour of trial and error. Experienced hands finish in around 2 hours. Three things slow you down: hinge alignment (keep gaps within ±0.5mm), latch engagement (check for 5.5mm minimum depth), and heat shield transfer.
Can I do this myself?
Got mechanical aptitude and your OEM manual? Go for it. No experience? Pay a shop instead. You’ll need a Dremel, files, a torque wrench, and a dust mask. Carbon fiber dust is a real respiratory hazard. Goggles and long sleeves are non-negotiable too.
What are the critical torque specs?
-
Hinge bolts: 18–22 Nm
-
Latch engagement depth: ≥5.5mm
-
Fender gap tolerance: ±0.5mm — anything wider needs shimming
How do I verify fitment before buying for a 2026 model?
Pull your VIN and cross-check OEM specs. Measure engine bay clearance — you need at least 12mm around manifolds, turbos, and the battery. Check that vent positions line up. Universal fit does not mean fitted to your car.
What ongoing maintenance does a carbon fiber hood need?
Do a check every month. Look over the hood pins, scan hinges for microfractures, and make sure latch depth hasn’t shifted. Re-torque bolts to 18–22 Nm any time something feels loose. Stay away from abrasive cleaners. For adhesive residue, rubbing alcohol is all you need.
Conclusion
You’ve got everything you need — the tools list, the fitment steps, the alignment tricks, and the straight answer on hood pins. Installing a carbon fiber hood is a real upgrade. Go in prepared, and the payoff is worth every step.
Here’s what matters before you close this tab:
-
Measure twice before you drill anything
-
Never skip the heat shield if your engine runs hot
-
Fit hood pins if you’re pushing above 80 mph on a regular basis
These aren’t optional tips. They’re the difference between a clean, lasting install and a costly mistake.
Your carbon fiber hood should turn heads, not create headaches. Still shopping for the right fitment? HyperX Carbon’s bolt-on hood lineup is built with OEM-spec mounting points. That means the install process stays as clear and direct as what you just read.
Contact HyperX Carbon – Your Trusted Chinese Carbon Fiber Partner
Ready to source high-performance carbon fiber materials or custom forged carbon fiber parts from China?
HyperX Carbon is a leading manufacturer with 20+ years of expertise, specializing in aerospace-grade forged carbon fiber, prepreg, carbon fiber tube, carbon fiber sheet, and lightweight carbon fiber automotive parts/carbon fiber drone components/carbon fiber medical components. We offer:
-
Stable supply chain with premium raw materials (Toray, Mitsubishi, Hengshen)
-
AS9100D certified production for aerospace & UAV applications
-
Rapid prototyping (5-8 weeks) and monthly capacity exceeding 180,000 parts
-
Competitive pricing with 15-18% cost savings on forged carbon solutions
-
Full customization: from T700/T1100G to ultra-high modulus grades
Whether you’re an eVTOL developer, automotive OEM, drone manufacturer, or medical device engineer, HyperX delivers consistent quality, batch-to-batch reliability, and reliable delivery.
Get in touch today for a free consultation, custom quote, or material sample.
📧 Email: [email protected]
🌐 Website: https://www.hyperxcarbon.com/
📞 Phone/WhatsApp: +86 15623270276 (English support available)
Let’s build your next lightweight innovation together – contact HyperX Carbon now and stay ahead in the low-altitude and advanced composites market.